Table of Contents
- Base Installation
- Prerequisites
- Installation of Keycloak
- Configuration of Keycloak
- Create an Olvid User Realm
- Create an Olvid Admin Realm
- Configure Keycloak to Send Emails
- Configuration of the Olvid Plugin
- Upgrading
- Additional Configuration
- Configuration of an External IdP
- Using LDAP User Federation
- x509 Client Certificates Authentication
- Configure Olvid via an MDM
- Using the management console
- How to use the Console
- Misc.
- Changelog
Create an Olvid User Realm
1. Creation of the realm
A Keycloak realm corresponds to a set of users. The master realm is used for the administration of the Keycloak server and will not be used for Olvid users. We are going to create a dedicated olvid realm for the Olvid users.
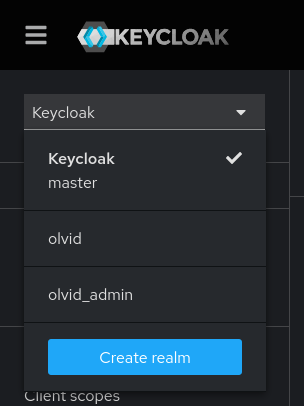
Place your mouse over the “Master” dropdown at the top left and choose “Add realm”. Create the olvid realm:
The realm must now be configured to choose which users can connect and how users authenticate with this realm. We explain how to configure an external Identity Provider further down this guide, but for now we will configure Keycloak with local users.
2. Configuration of the signature keys for this realm
By default, a newly created realm uses an RSA2048 key, which is a little “light” from a security standpoint. We recommend using elliptic curve keys. Open “Realm Settings”, the “Keys” tab, and the “Providers” sub-tab
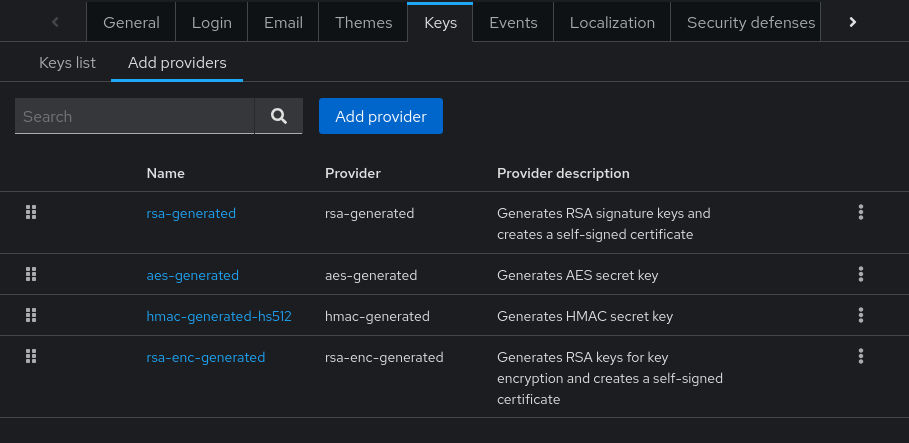
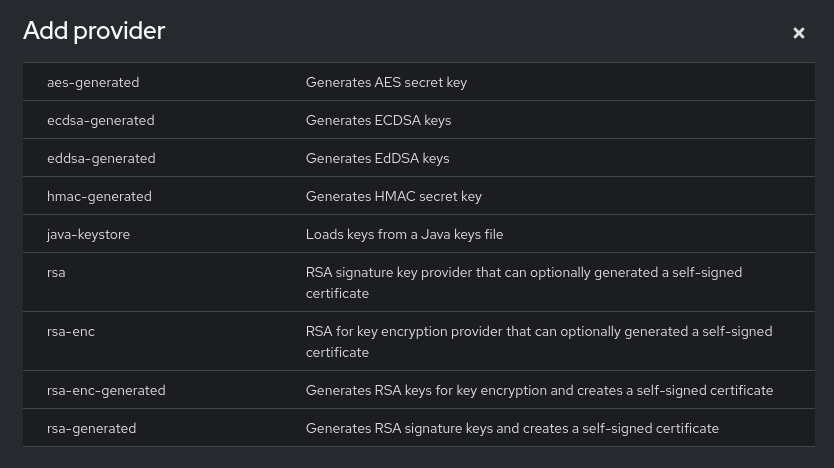
Click on “Add keystore… / ecdsa-generated”
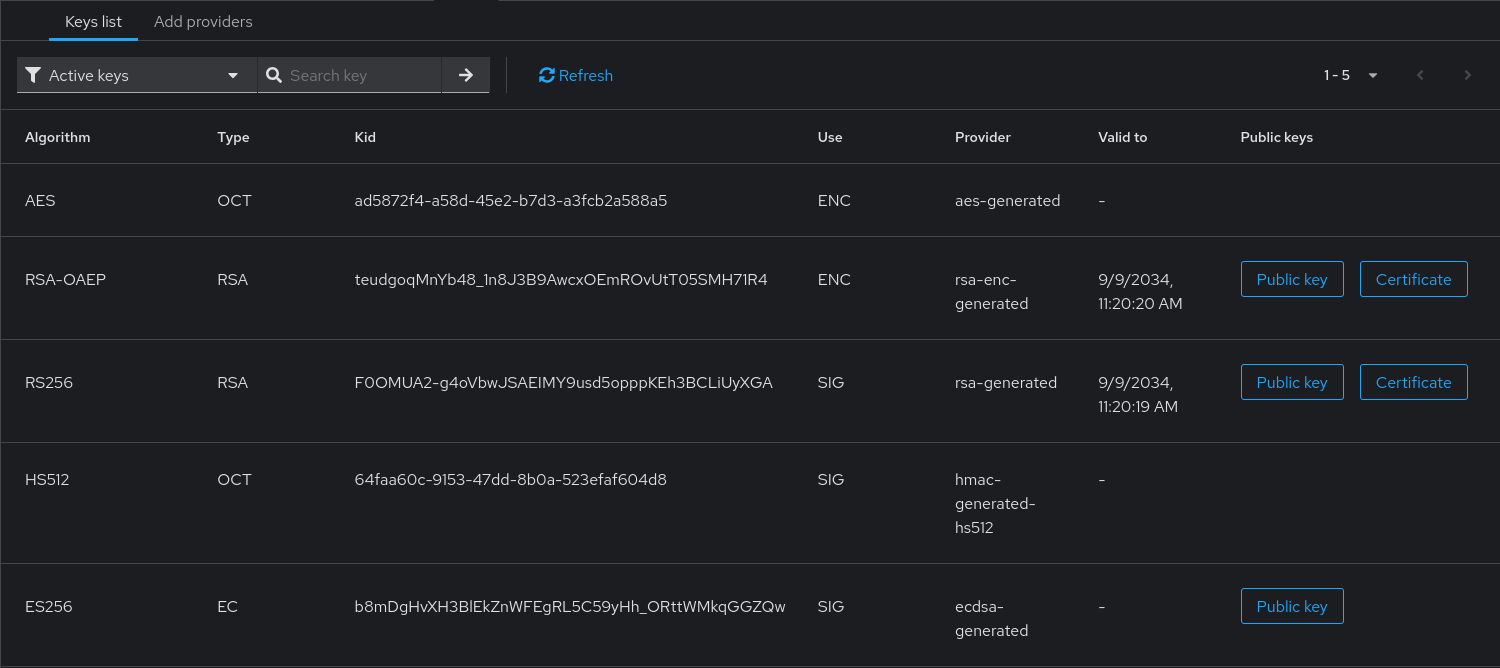
Choose the elliptic curve you wish to use (they are all acceptable) and click “Save”. Now in the “Active” sub-tab, you should have something like this:
3. Configuration of the lifespan of tokens
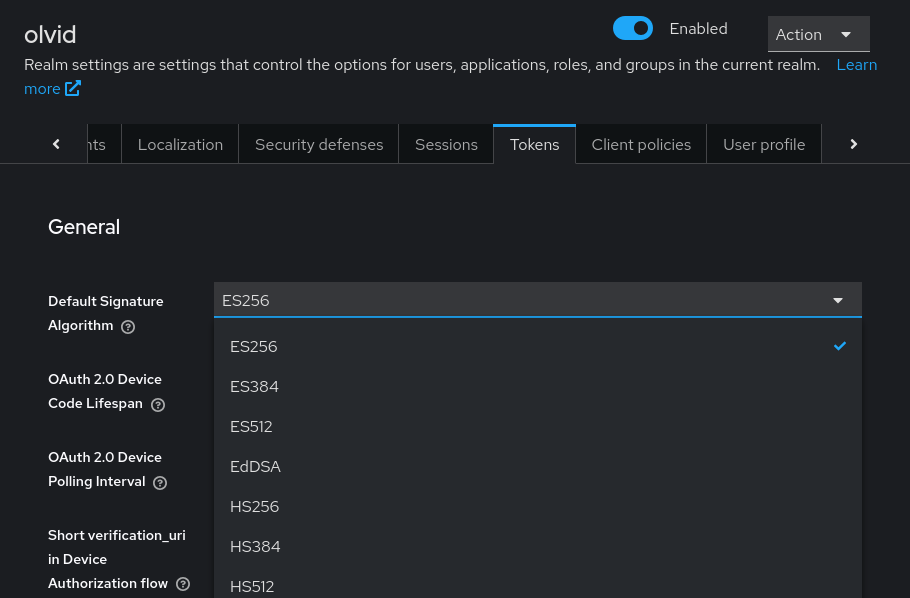
In “Realm Settings”, the “Tokens” tab allows configuring the lifespan of user sessions and the frequency at which users need to re-authenticate. Start by choosing the signature algorithm corresponding to the EC key you just added.
To understand the different configuration options, keep in mind that the openID connect authentication mode Olvid uses relies on 2 tokens:
- an access token, with a short lifespan, which is used to authenticate with the REST API entry points of the Olvid Plugin
- a refresh token, with a long lifespan, which allows to seamlessly refresh the access token.
The most important parameter controlling the lifespan of these tokens are:
- SSO Session Idle: this is the duration during which the refresh token session lasts on the Keycloak server. Therefore, it is the maximum time of inactivity allowed for a user between two access token requests. We recommend a duration of a few days, for example 7 days. If a user does not launch Olvid during this time frame, he will have to re-authenticate at the next launch.
- SSO Session Max: this is the maximum lifespan for a refresh token. Each time a refresh token is used, its expiration time will be extended on the server. This value controls the maximum time it will be extended. The users will be forced to re-authenticate after this period, even if they use Olvid every day. We recommend setting a rather long duration, for example 30 days.
- Access Token Lifespan: this is the lifespan of an access token. This duration is less important than the previous two as it does not impact the users. We recommend setting a lifespan of a few hours, for example 6 hours, which allows not having to refresh the access token every time a request is sent to the Keycloak server.
The default values of other parameters are acceptable and have no impact on the users.
Keep in mind that, at any moment, the administrator can decide to end a session or to end all sessions. Users will then have to re-authenticate.
4. Using offline sessions
By default, Keycloak will use standard in-memory sessions, using the lifespans described above. This means that each time the Keycloak server is restarted, all sessions expire and users have to re-authenticate. This can be circumvented by using so-called offline sessions. These sessions are stored in the database and persisted between server restarts. By default, offline sessions do not have a maximum lifespan and only expire after a certain idle duration.
We recommend using offline sessions if you never want your users to re-authenticate, but for normal usage, standard sessions are probably the best choice (unless you plan on restarting your Keycloak server on a regular basis). If you chose to use offline sessions, these parameters will be used:
- Offline Session Idle: this is the duration during which the offline session lasts on the Keycloak server. Each time the offline session is used, this timeout is reset. The default value is 30 days, which is probably enough for all scenarios.
- Offline Session Max Limited: by default this is off, meaning offline sessions can be used indefinitely, as long as the session idle is not exceeded. If you set it to on your offline sessions maximum lifespan will be controlled by the Offline Session Max parameter that appears just beneath it.
5. Adding a first user
Users may be created directly from the Olvid management console, but for simplicity, start by creating a user using the Keycloak administration interface.
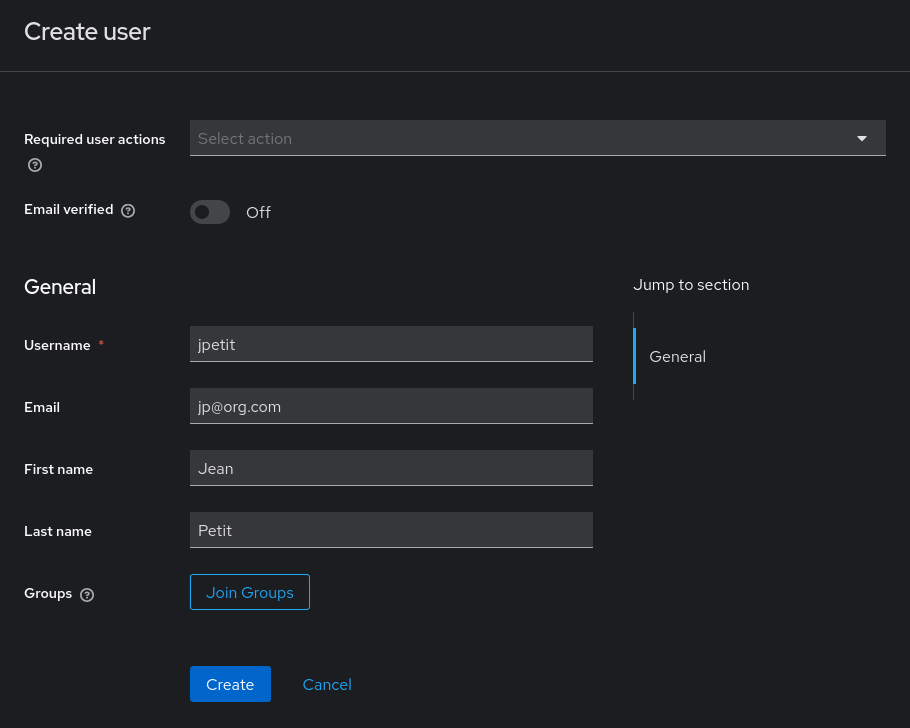
Make sure the olvid realm is selected (at the top left), then click “Users” then “Add user”.
![]()
The only fields used by Olvid are the Username (for authentication), the First Name and Last Name (used to set the user’s Olvid card).
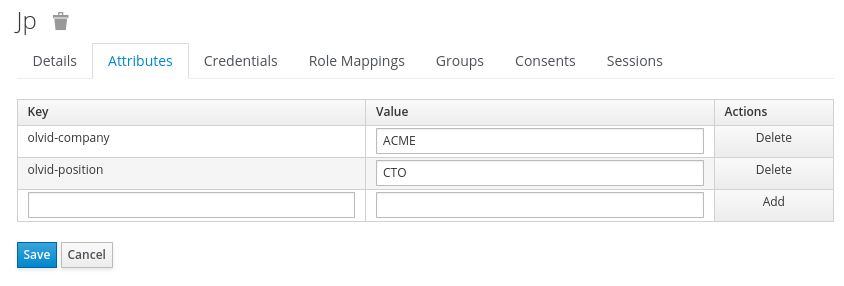
Once user jp is saved, it is possible to add a Position and Company (also part of the Olvid card) by adding user attributes olvid-position and olvid-company.
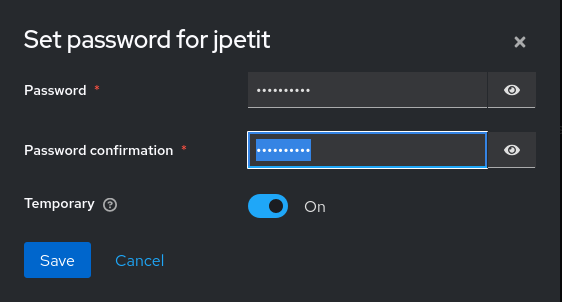
You must then create a password for jp in the “Credentials” tab (temporary or not).
6. Creation of an Olvid “client”
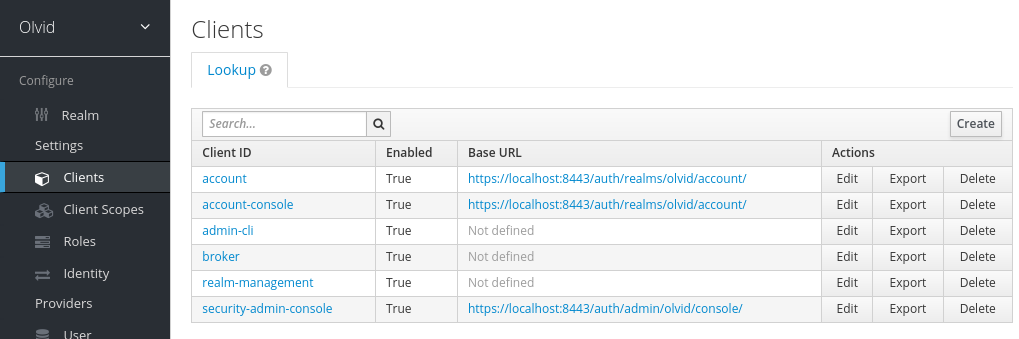
A “client” for Keycloak is simply a means of authenticating a user with Keycloak. In our case, we must create a client in the olvid realm for the mobile application to authenticate users.
By default, a newly created realm contains several pre-configured clients. These clients allow users to, for example, change their details and password. Depending on the authentication method you choose for Olvid, you may deactivate these clients as they are not used by Olvid for authentication. Be careful, configure this in the olvid realm, not in master. Otherwise, you risk not being able to authenticate with the Keycloak admin console anymore.
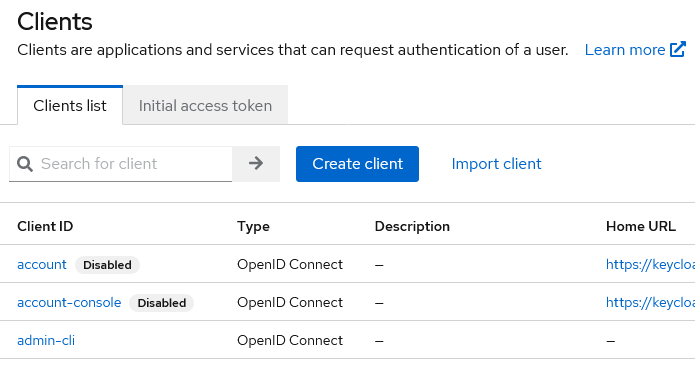
As you probably do not want your users to be able to freely change their name, position and company, we recommend disabling the account and account-console clients.
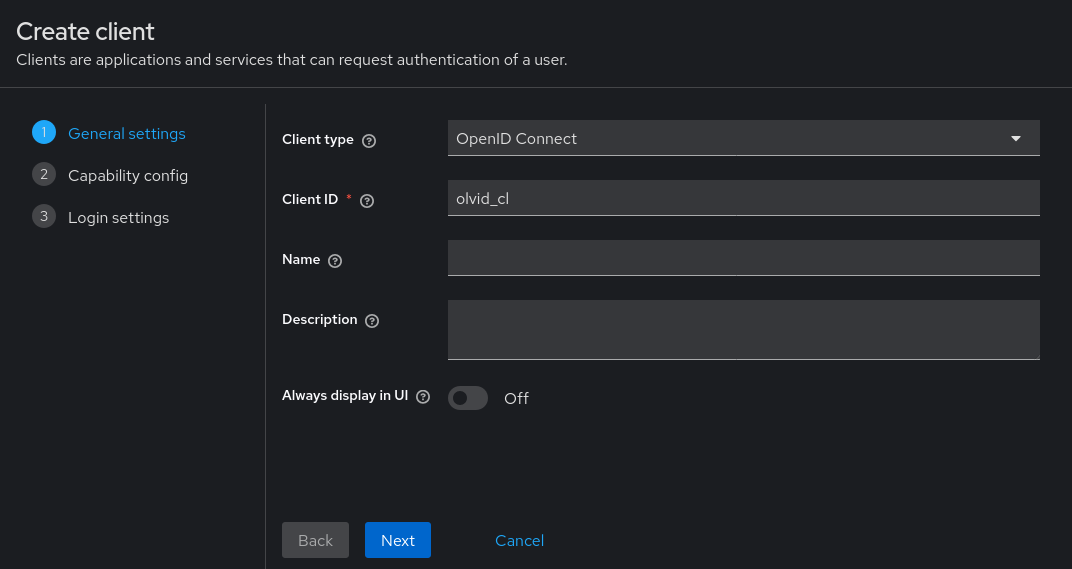
Now, click “Create” to create an olvid_cl client inside the olvid realm. Make sure you choose the “openid-connect” protocol:
Once the client is created, you may configure it. The two important options are:
- “Access Type”: select “confidential” (this adds a little bit of security at no cost)
- “Valid Redirect URIs”: enter
https://openid-redirect.olvid.io/(this is the redirection url used by Olvid after authentication). Be careful, the / at the end of this url is mandatory for the authentication to work.
Press “Save” to save these changes.
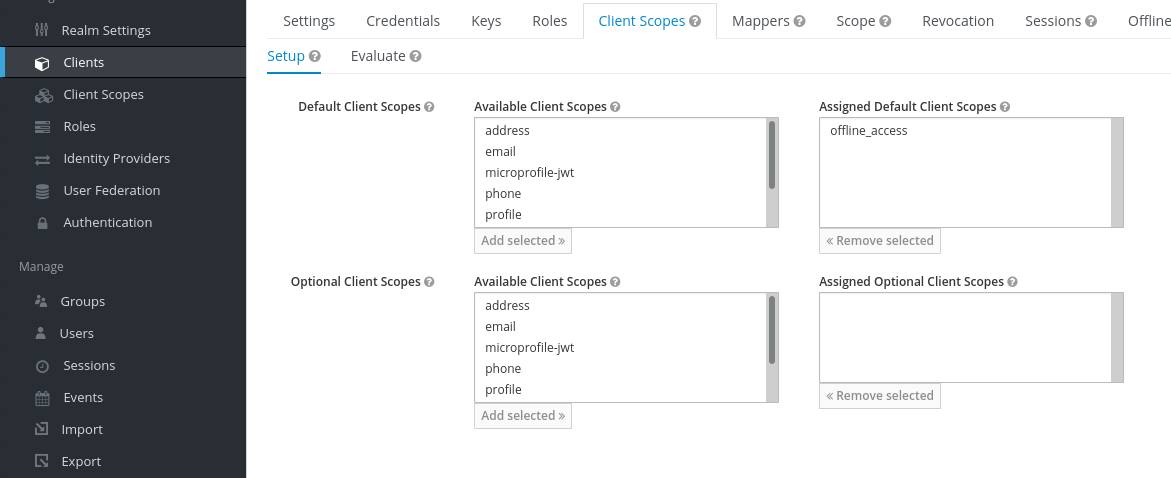
Now, if you choose to use offline sessions, you also need to configure this client to use offline sessions by default. Open the “Client scopes” tab of the newly created olvid_cl client, select “offline_access” from the “Available Client Scopes” list and click “Add selected »”. If “offline_access” is not in this list, you must first remove it from the “Assigned Optional Client Scopes”.