Table of Contents
- Base Installation
- Prerequisites
- Installation of Keycloak
- Configuration of Keycloak
- Configuration of the Olvid Plugin
- Upgrading
- Additional Configuration
- Configuration of an External IdP
- Using LDAP User Federation
- x509 Client Certificates Authentication
- Configure Olvid via an MDM
- Microsoft Intune
- Workspace ONE
- Using the management console
- Use the Olvid Management Console
- Misc.
- Changelog
Configure Olvid in Microsoft Intune
In this section, we assume that your user devices are enrolled and managed in Intune. For Android, this corresponds to personal devices with a Work Profile or Fully Managed corporate-owned devices. For iOS/iPadOS devices, this corresponds to personal- or company-owned (enrolled through Apple School Manager/Apple Business Manager or manually) devices.
1. Install Olvid on the devices
Before being able to configure Olvid with Intune :
- for Android the Olvid app must be added to the list of approved “Managed Google Play app”
- for iOS, the Olvid app must be “bought” to be added to the list of allowed applications. Two methods are available:
- Using the device’s owner Apple ID account
- Using the corporate’s iOS volume purchase program / VPP, (an Apple School Manager/Apple Business Manager account is needed)
Android
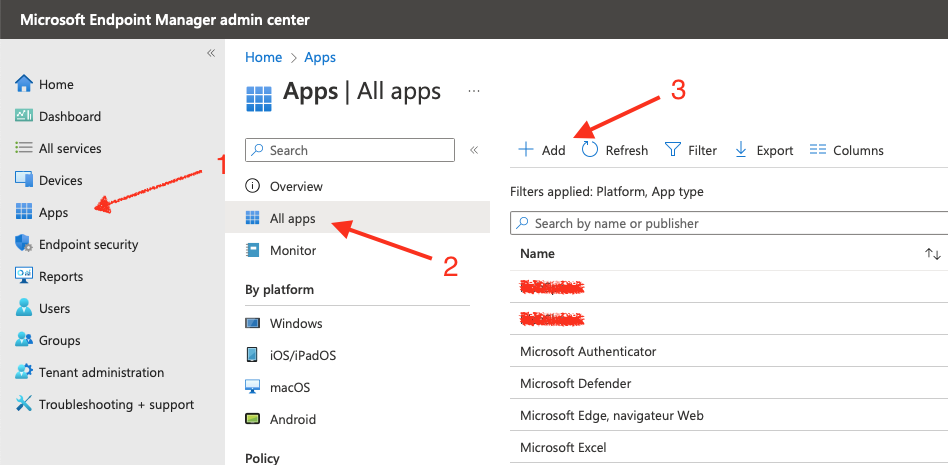
- Open Microsoft Endpoint Manager admin center
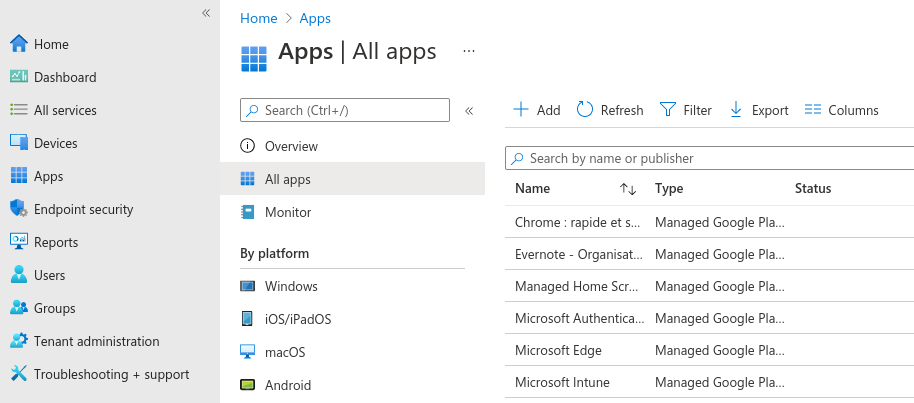
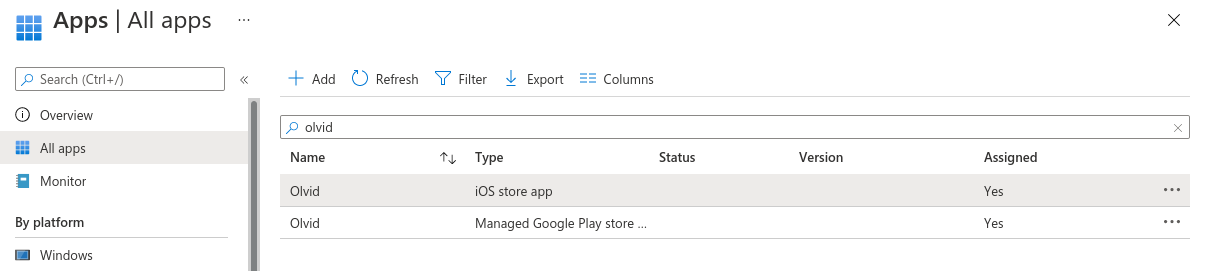
https://endpoint.microsoft.com/ - Open Apps > All apps and click Add.
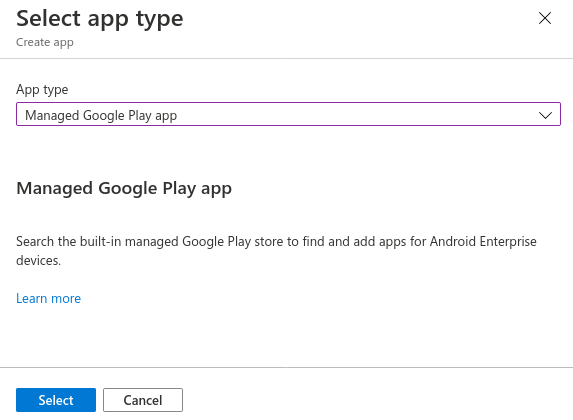
- Select Managed Google Play app from the drop down menu and click Select at the bottom.
- Search for “olvid” on the store.
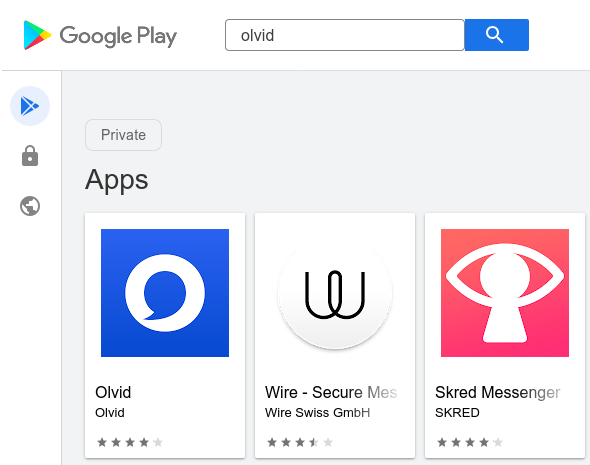
- Click on Olvid, then click the Approve button and confirm approval in the dialogs that open.

If you return to the All apps tab, Olvid should now appear in your list of apps.
Now that the app is listed, you must allow it on your user devices, or you may even force its installation.
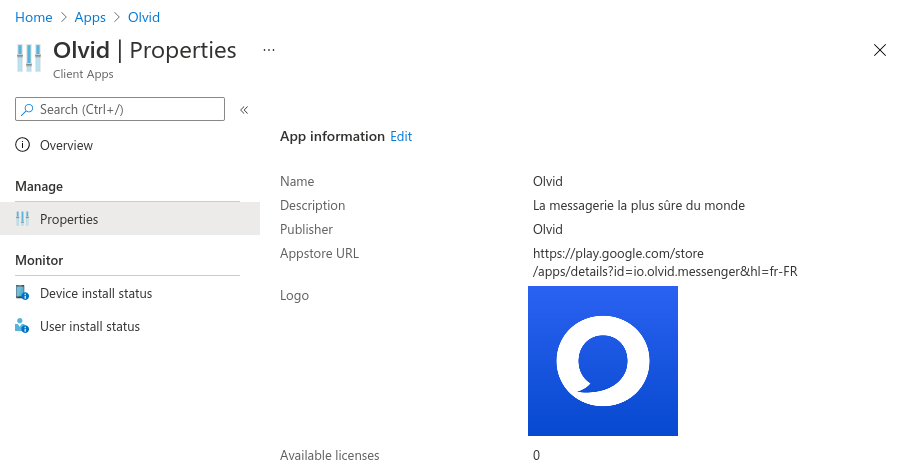
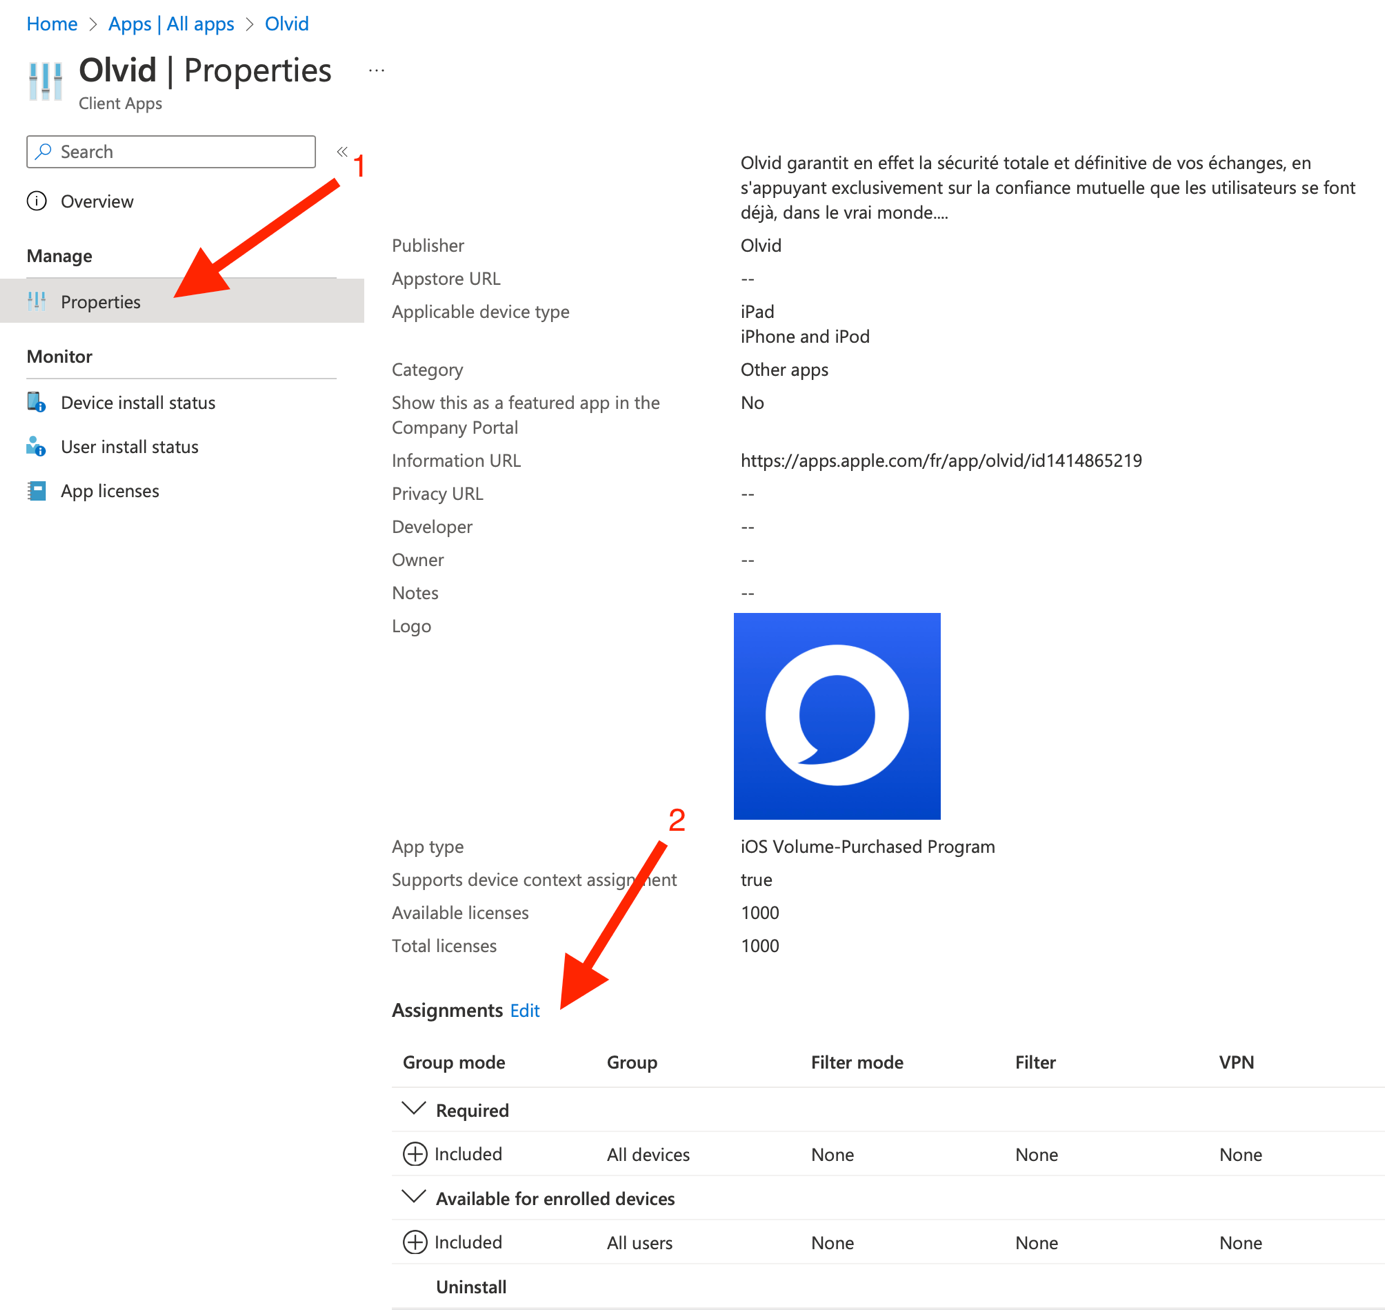
- From your list of apps, click on Olvid and open the Properties tab.
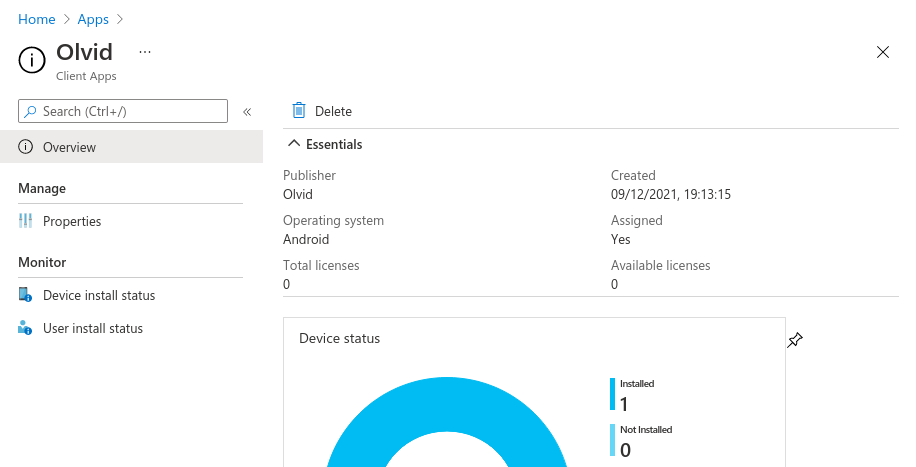
- Scroll down to the Assignments part and click Edit.
- Choose either Required for some devices
- or Available for some users.
- Review + save your changes.
That’s it, Olvid should now be available in Google Play for the selected users. Of course, synchronization with the Intune server may take some time!
Apple (Apple ID account)
- Open Microsoft Endpoint Manager admin center.
- Open Apps > All apps and click Add.
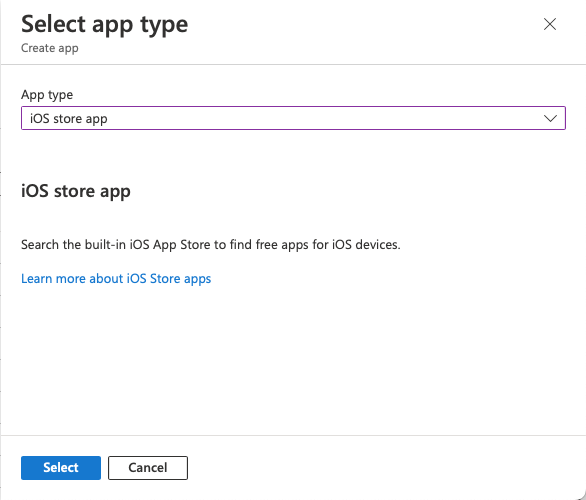
- Select “iOS Store app” from the drop-down menu and click Select at the bottom.
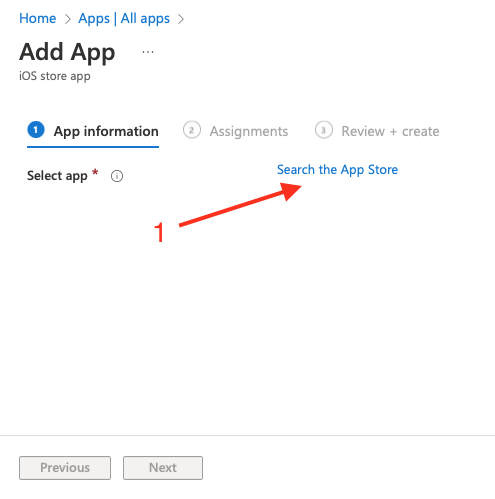
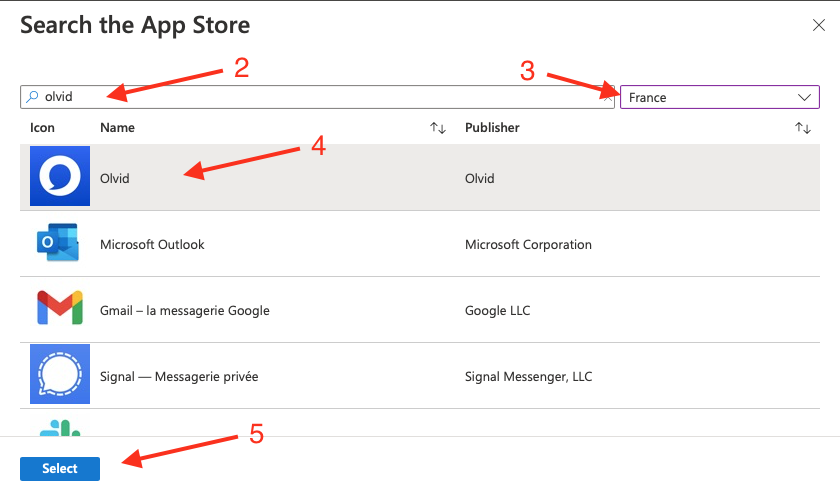
- Search “Olvid” for your region and select it.
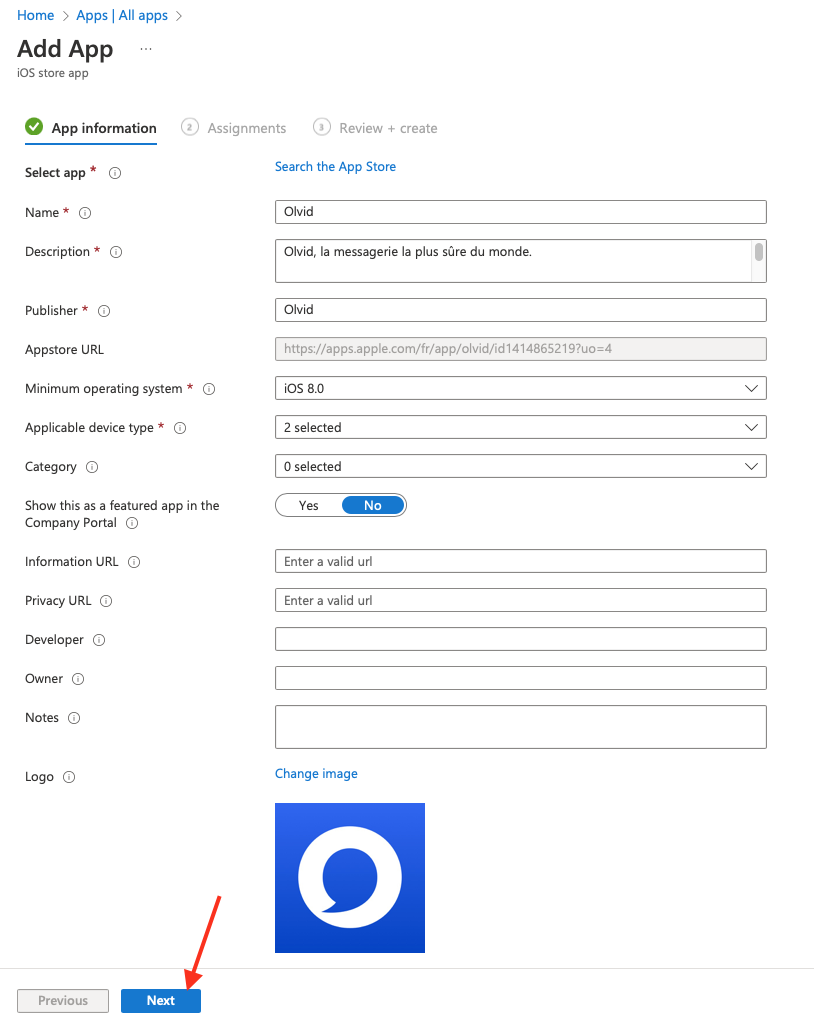
- The app information form is automatically filled, you can click Next.
- You can then assign the app to specific devices or users, to allow them to install it, or you may even force its installation using Add group, Add all users and Add all devices buttons accordingly. To validate, click Next.
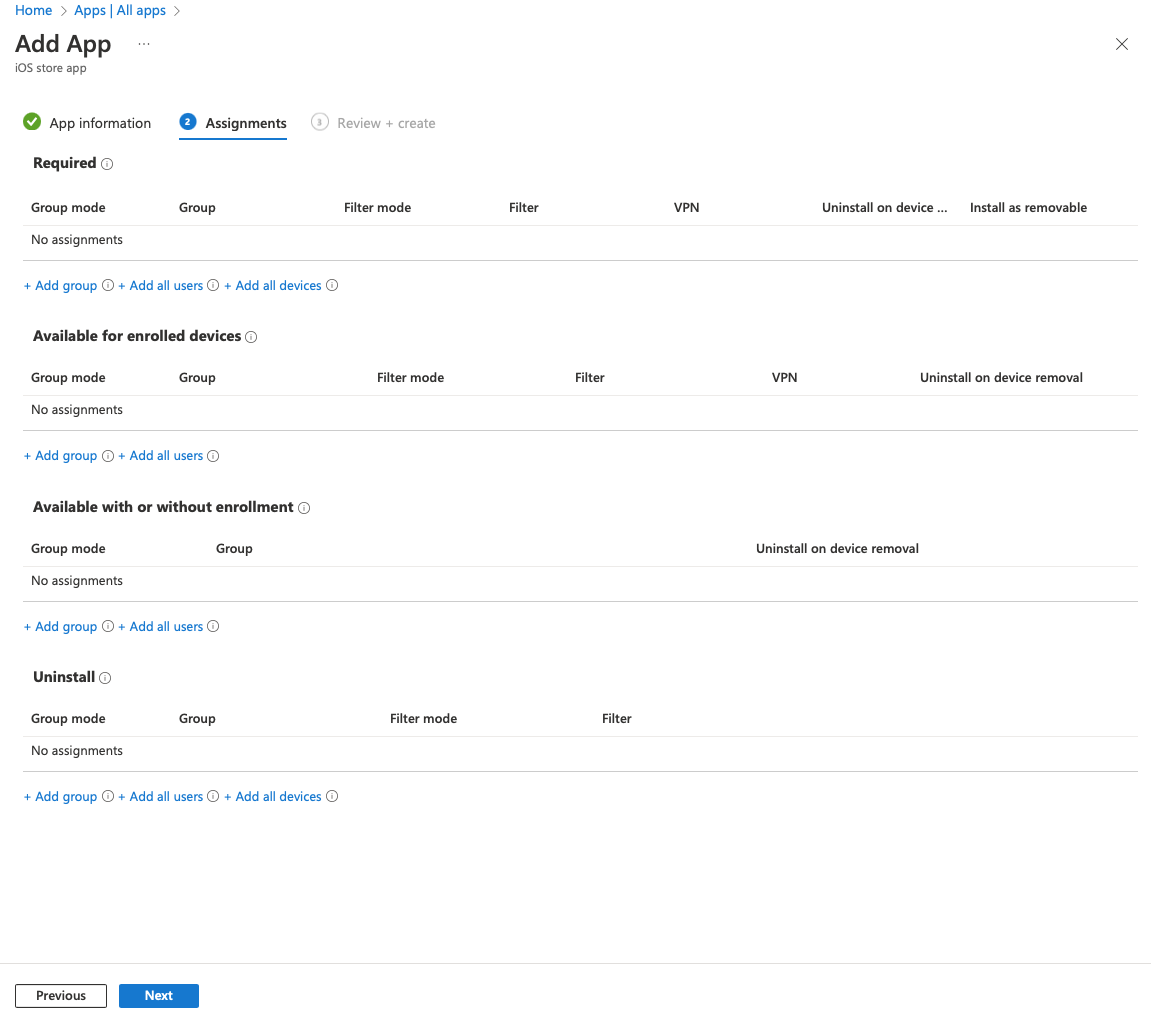
- You can review settings before clicking Create.
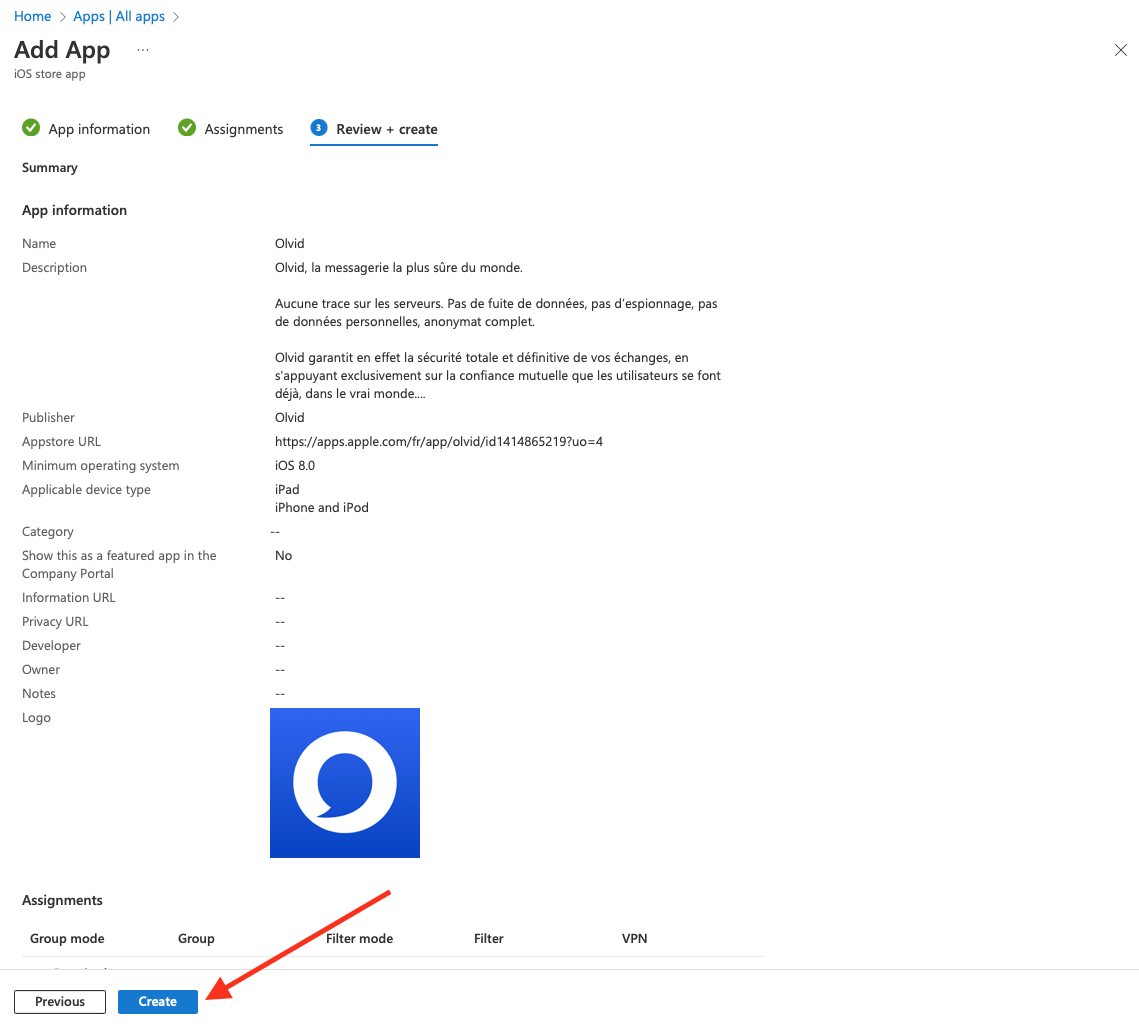
That’s it, Olvid should now be available for installation. Of course, synchronization with the Intune server may take some time!
Apple (volume purchase program)
This method may be preferred with corporate-owned devices, as licensing can be managed directly by the company, through an existing Apple Business Manager/Apple School Manager account.
This guide assumes that you already have a working ABM/ASM account, an active Volume Purchase Program and a VPP token set in your Intune tenant.
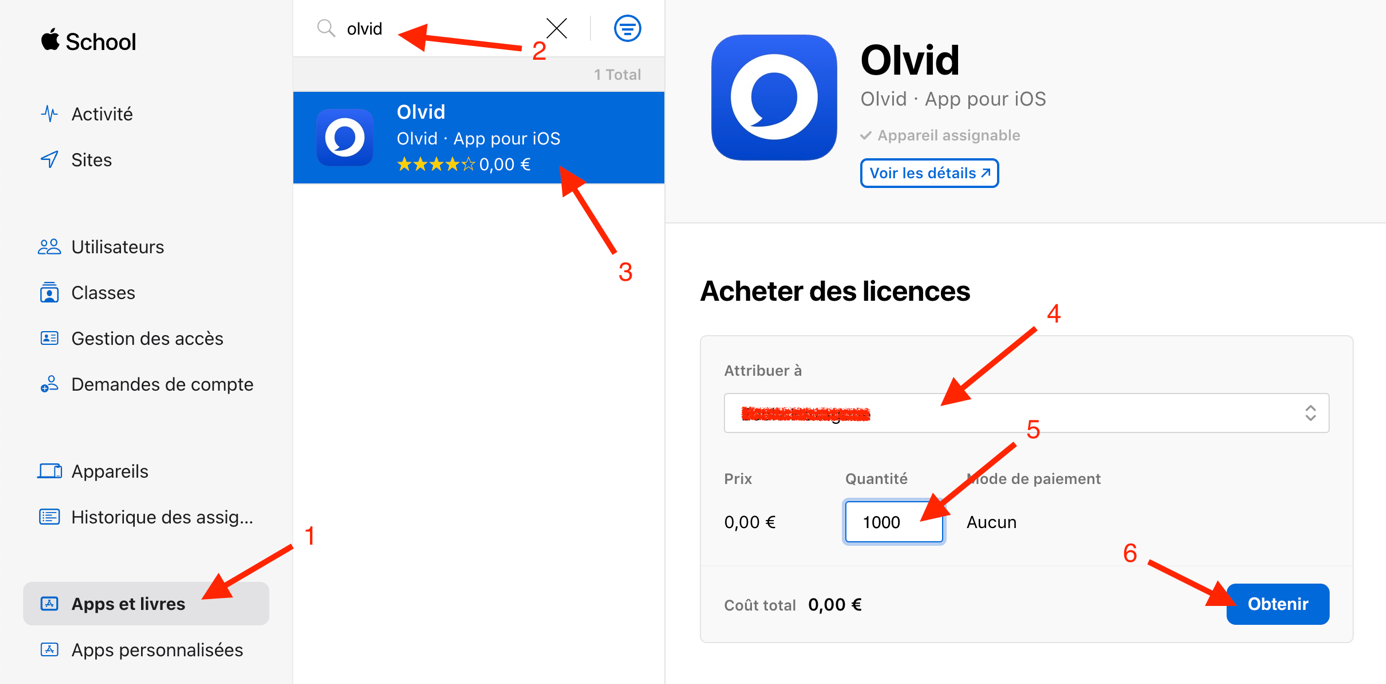
- Open Apple Business Manager or Apple School Manager website
- Purchase Olvid licenses in Apps and Books. You will need to search for the app using the search bar, select it, then assign licenses to a site and a quantity (steps 4 and 5) before clicking Get.
- Licenses synchronization may take a few hours before being available in Intune. Olvid application will then appear in Microsoft Endpoint Manager admin center.
- Open Apps > All apps and click on Olvid – iOS volume purchase program app in the list.
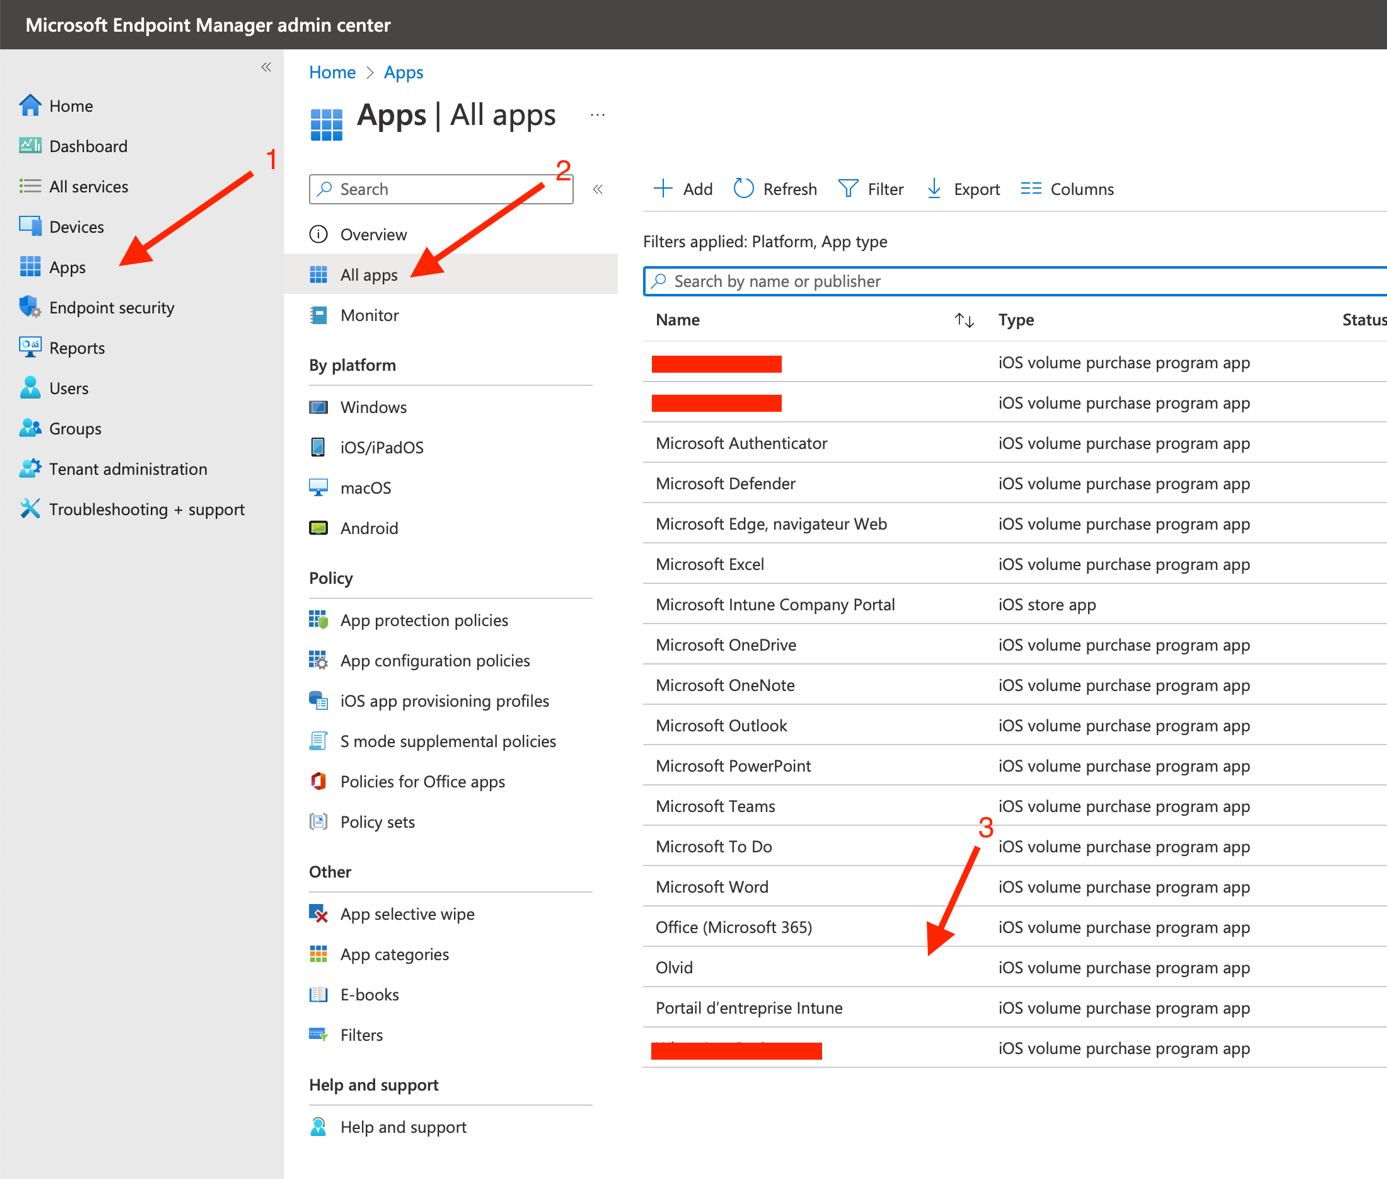
- Then open Properties > Assignments: edit button.
- You can then assign the app to specific devices or users, to allow them to install it, or you may even force its installation using Add group, Add all users and Add all devices buttons accordingly. To validate, click Review + save.
That’s it, Olvid should now be available for installation. Of course, synchronization with the Intune server may take some time!
2. Push the Keycloak configuration to Olvid
Android
For this part, you may refer to the official Microsoft documentation at:
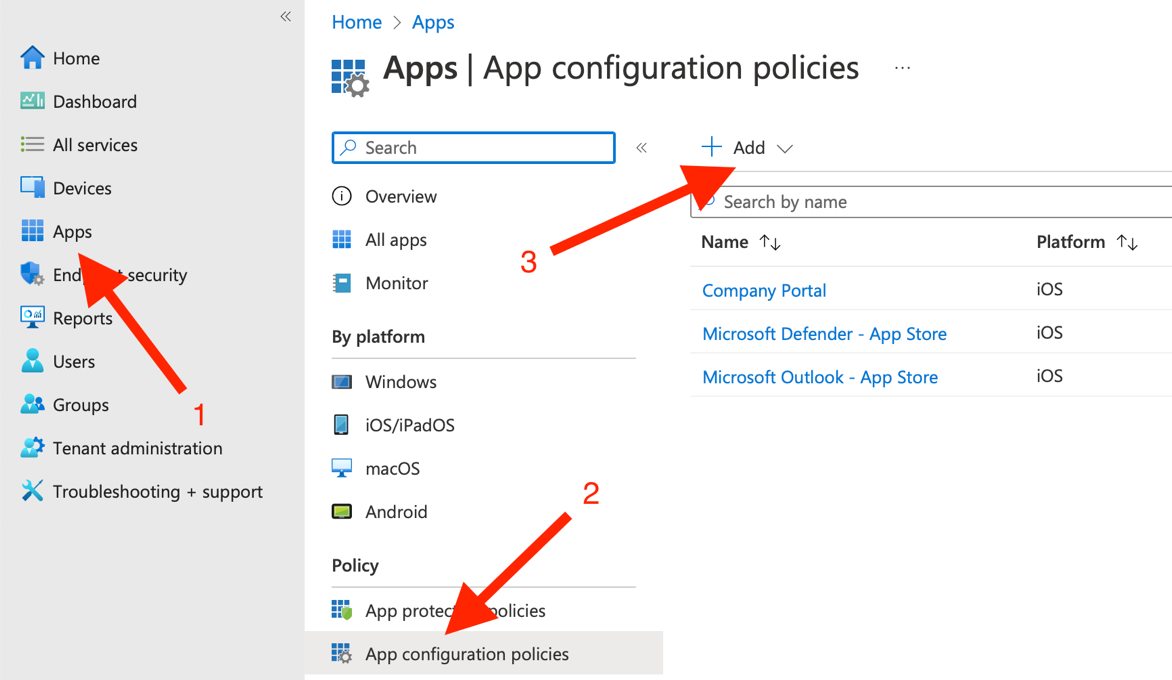
- Go back to the Apps section and this time, choose App configuration policies.
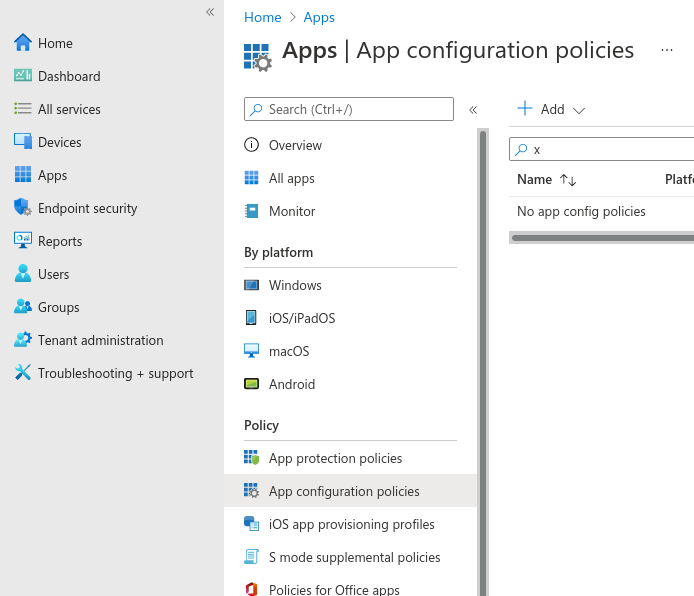
- Click Add at the top, and select Managed devices.
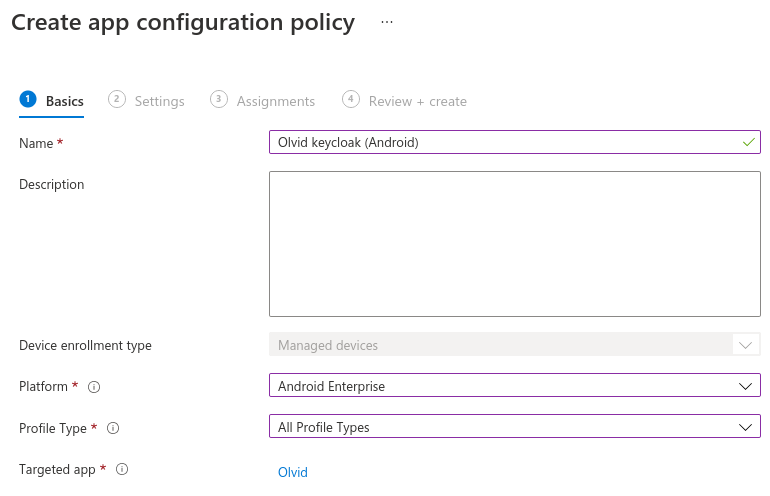
- Choose a name for your configuration: something like “Olvid keycloak (Android)”.
- Select Android Enterprise for the Platform.
- Choose which Profile Type to apply this configuration to.
- Click select app and choose Olvid in the right panel.
- Click Next to reach the Settings tab:
- Click +Add at the top to automatically grant specific Permissions to Olvid. We recommend selecting Camera, Record audio, Phone state (read), and Notifications (for Android 13 devices).
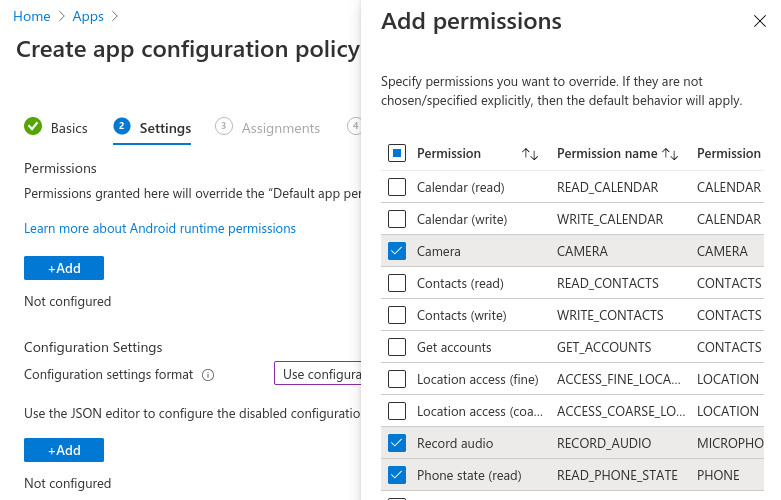
- Select Auto grant for each of these permissions.

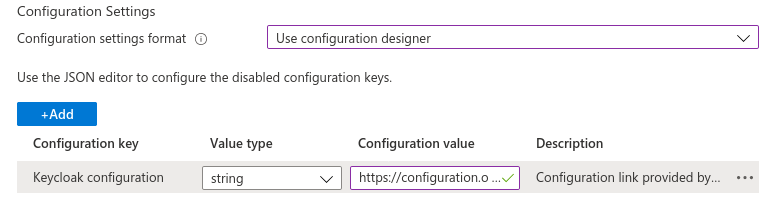
- Choose Use configuration designer for the configuration settings format, click the +Add button below, and check Keycloak configuration in the right panel.
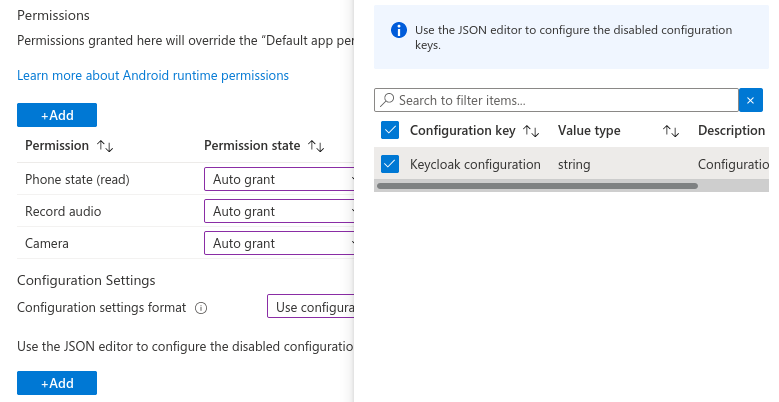
- In the Configuration value field, enter the keycloak configuration link you can retrieve from the Olvid Management Console (in the user realm dashboard page).
- Click Next to reach the Assignments tab and choose who to assign this configuration to.
- Click Next once again and Create.
That’s it, Olvid should now be configured for your users once they install Olvid. Again, synchronization with the Intune server may take some time!
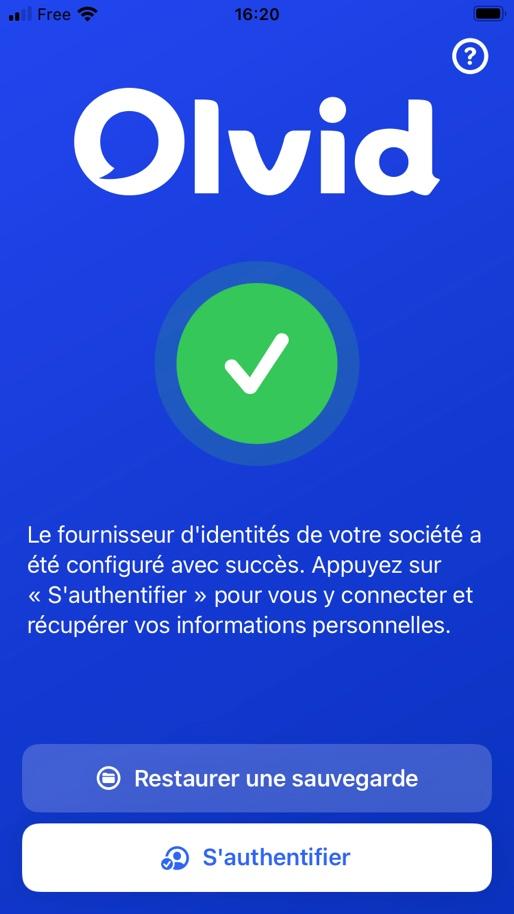
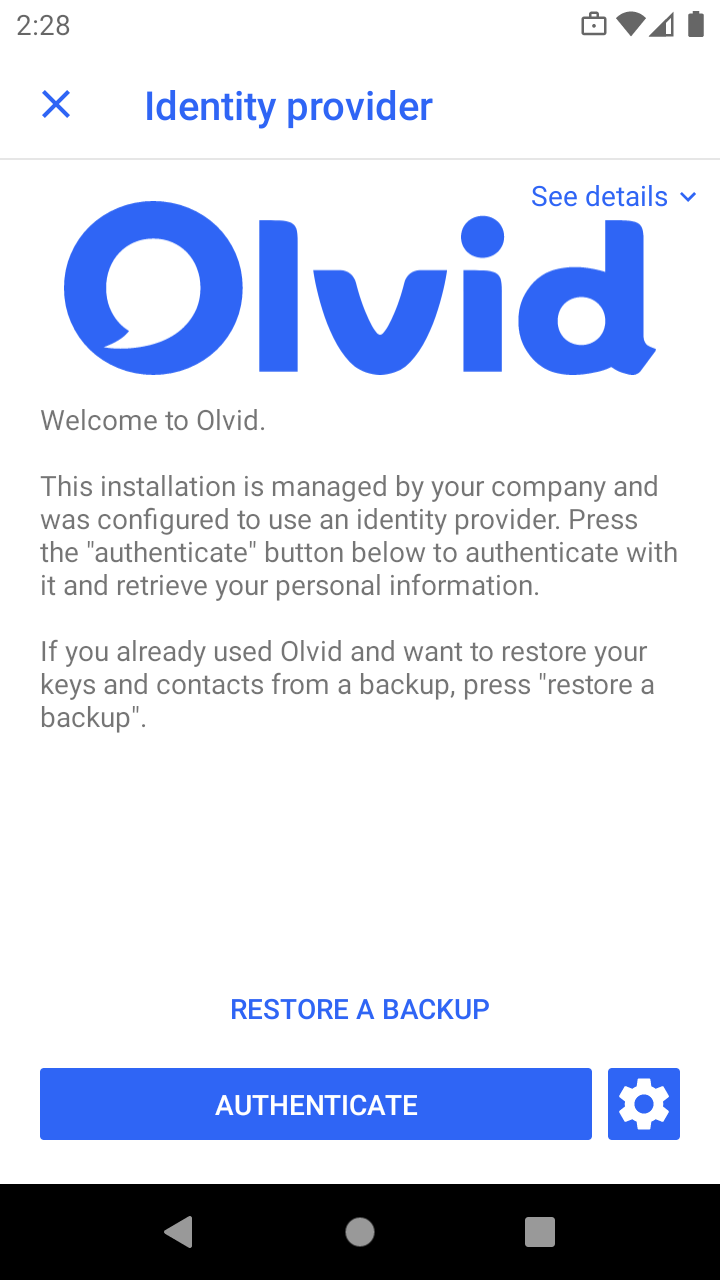
The first time your users launch Olvid, they should see the following screen, directly prompting them to authenticate, instead of the usual blue startup screen:
Apple
For this part, you may refer to the official Microsoft documentation at:
- Open Microsoft Endpoint Manager admin center.
-
Open Apps > All configuration policies, click Add, and then Managed devices.
- Choose a name for your configuration: something like Olvid (iOS).
- Select iOS/iPadOS as platform.
- Select app, and then select Olvid in the right panel, click OK.
- Click Next.

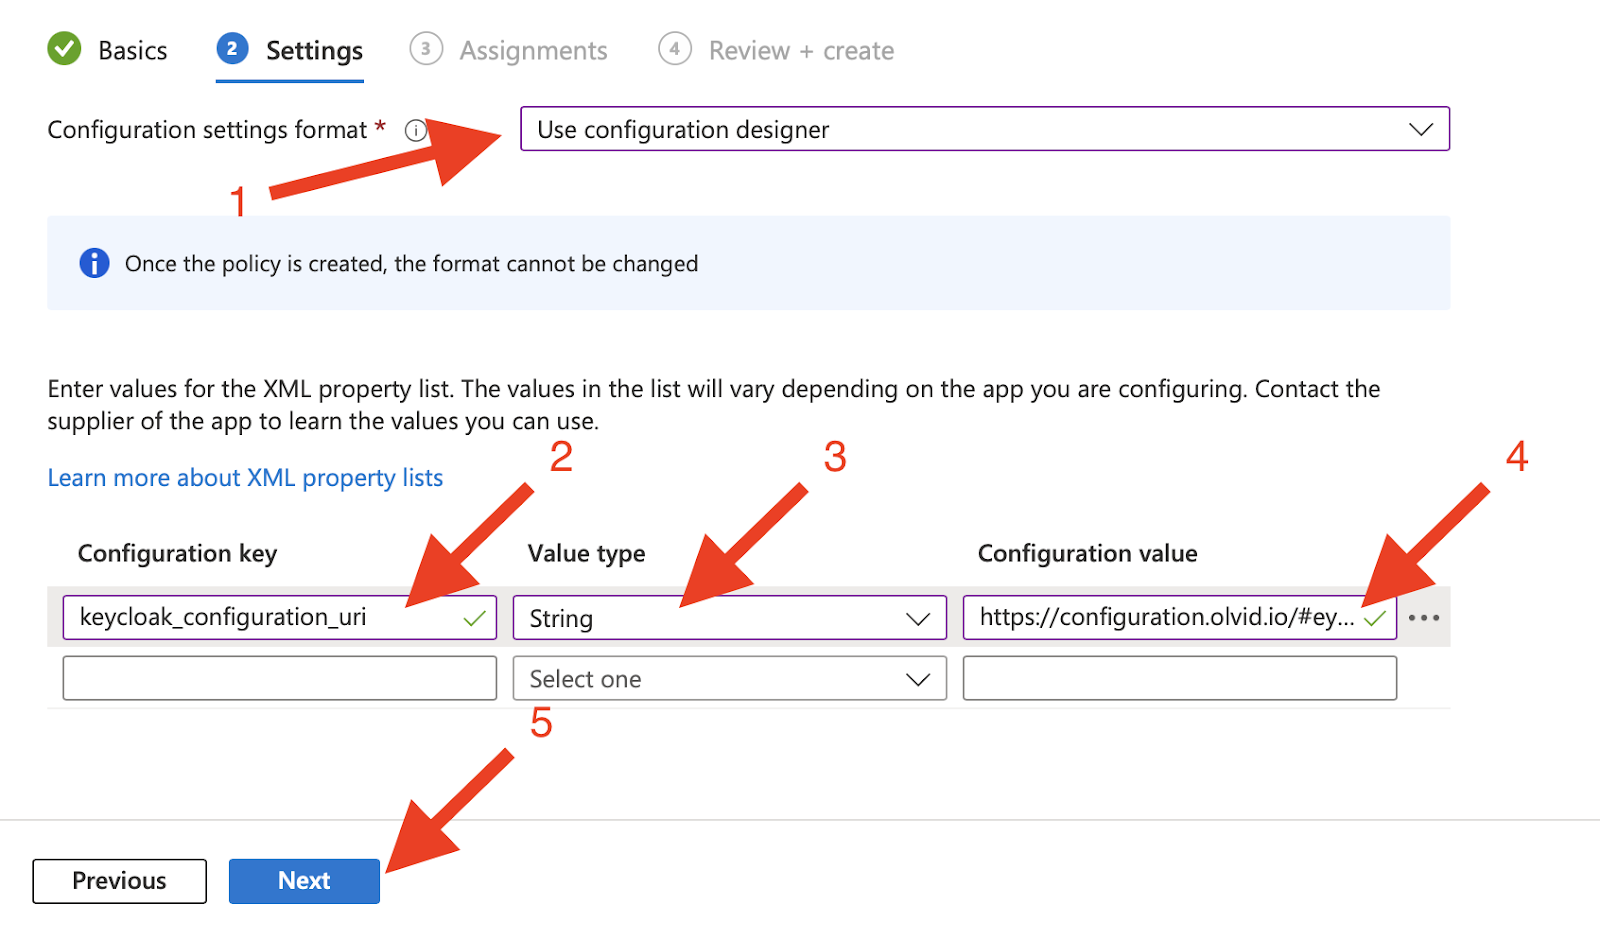
- Select Use configuration design as Configuration settings format.
- Enter
keycloak_configuration_uriin configuration key field. - Set String as value type.
- Enter in configuration value field the keycloak configuration link you can retrieve from the Olvid administration console (in the user realm dashboard page).
- Click Next.
- Enter
- On the Assignments tab, you can choose to assign this configuration to All devices, All users or specific groups. Then click Next.
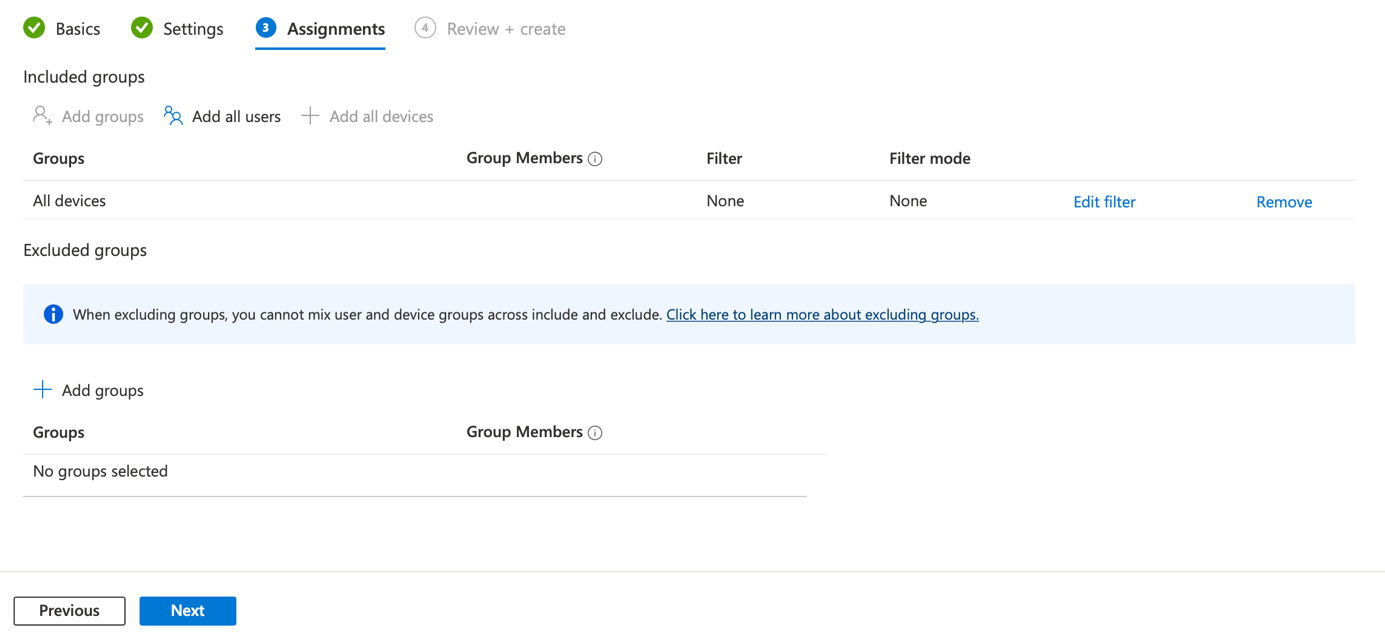
- On the Review + create tab, you can review your configuration before applying it using Create button.
That’s it, Olvid should now be configured for your users once they install Olvid. Again, synchronization with the Intune server may take some time!
The first time your users launch Olvid, they should see the following screen, directly prompting them to authenticate, instead of the usual blue startup screen: