Table of Contents
- Base Installation
- Prerequisites
- Installation of Keycloak
- Configuration of Keycloak
- Configuration of the Olvid Plugin
- Upgrading
- Additional Configuration
- Configuration of an External IdP
- Using LDAP User Federation
- x509 Client Certificates Authentication
- Configure Olvid via an MDM
- Microsoft Intune
- Workspace ONE
- Using the management console
- Use the Olvid Management Console
- Misc.
- Changelog
Configure Olvid in Workspace ONE
In this section, we assume that your user devices are enrolled and managed in Intune. For Android, this corresponds to personal devices with a Work Profile or Fully Managed corporate-owned devices. The iOS documentation for Workspace ONE is not available yet.
1. Install and configure Olvid on the devices
Before being able to configure Olvid with Workspace ONE, the Olvid app must be added to the list of approved native apps.
- Open Workspace ONE UEM.
- Open Apps & Books > Applications > Native and select the Public tab.
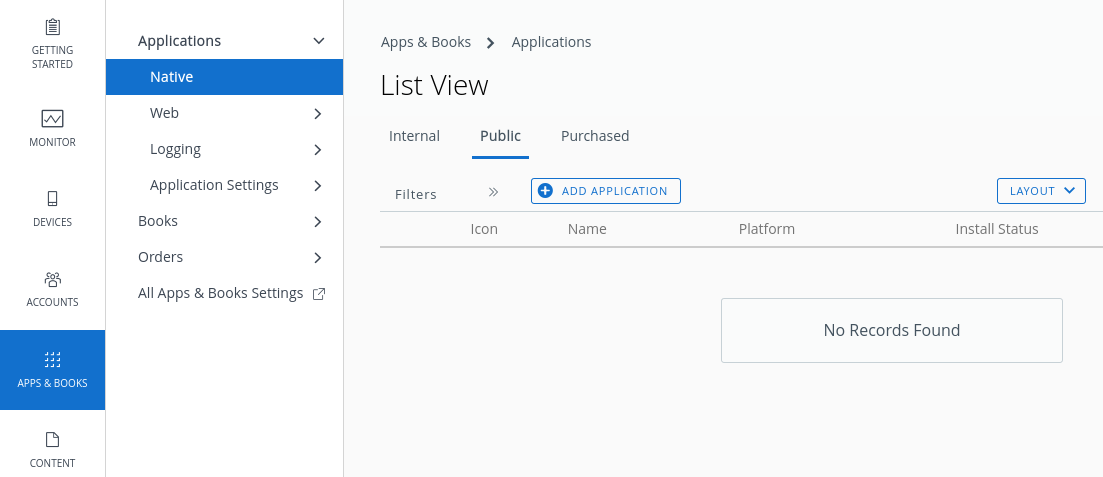
- Click the Add Application button and:
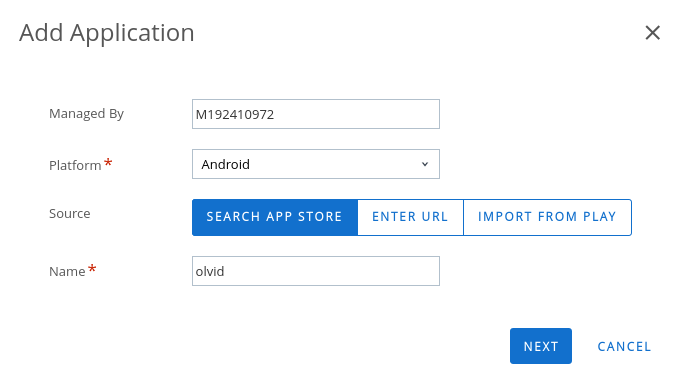
- Select Android for the Platform.
- Enter “olvid” for the Name.
- Click Next.
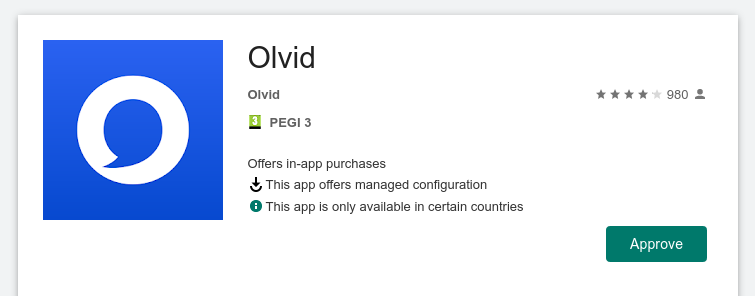
- Click on Olvid in the store page that opens, then click the Approve button and confirm approval in the dialogs that open.
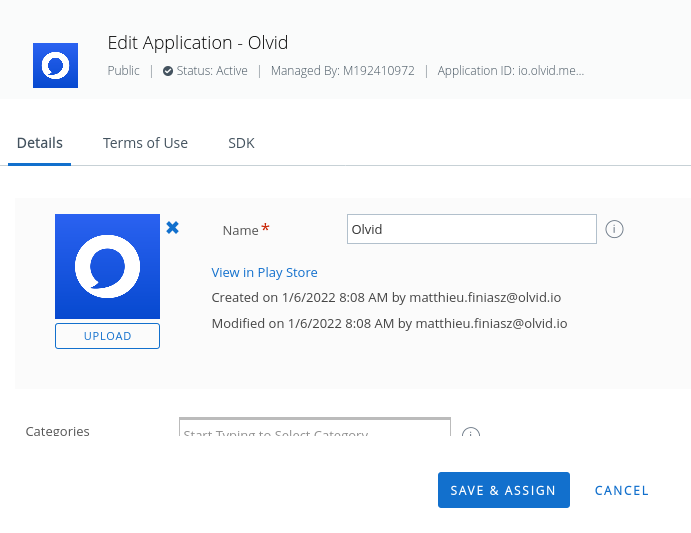
- An Edit Application dialog opens to customize the way Olvid is displayed to your users in the Google Play store. The default settings should be ok, so you can click Save & Assign.
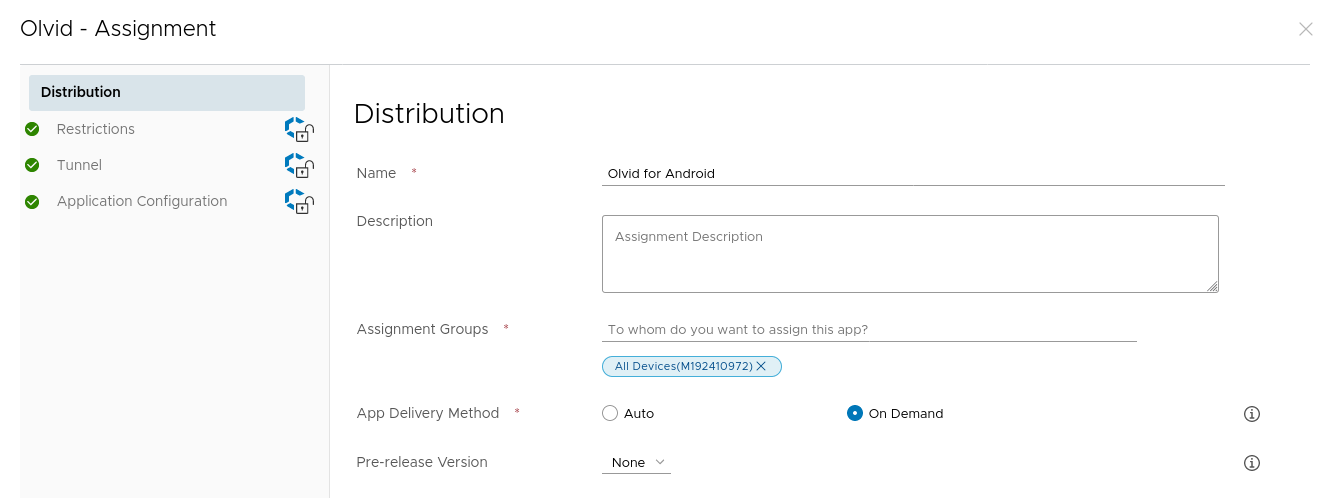
- An Olvid - Assignment dialog opens
- In the Distribution tab,
- Enter something like “Olvid for Android” as the Name.
- You may add a description if you want.
- In Assignment Groups, choose on which devices you want Olvid to be installed: choose All Devices to allow the installation and configuration of Olvid on all enrolled devices.
- Choose the App Delivery Method: Auto forces the installation of the app on the selected devices.
- In the Application Configuration tab
- Activate the Send Configuration switch.
- For the field Keycloak configuration, enter the keycloak configuration link you can retrieve from the Olvid Management Console (in the user realm dashboard page).
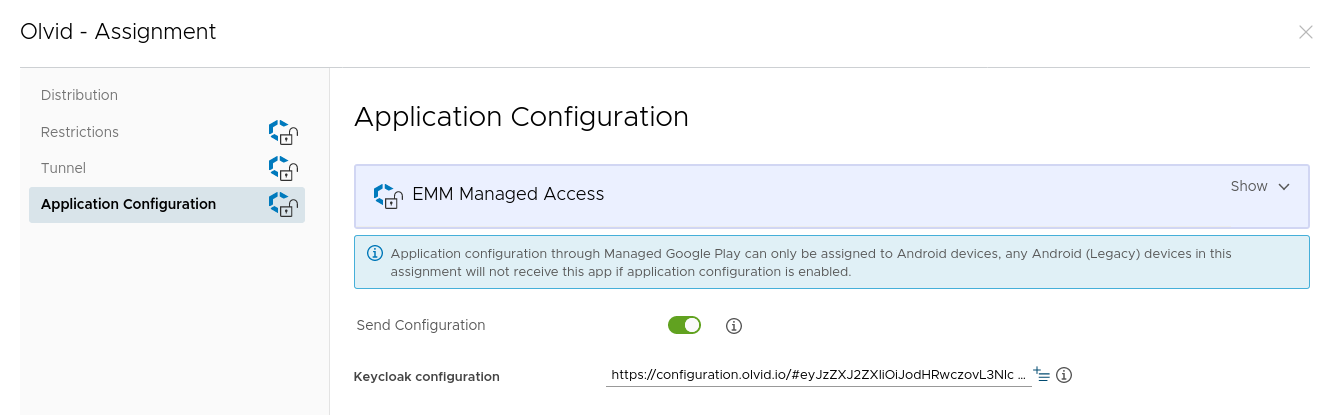
- Click on Create, then on Save, then on Publish.
- In the Distribution tab,
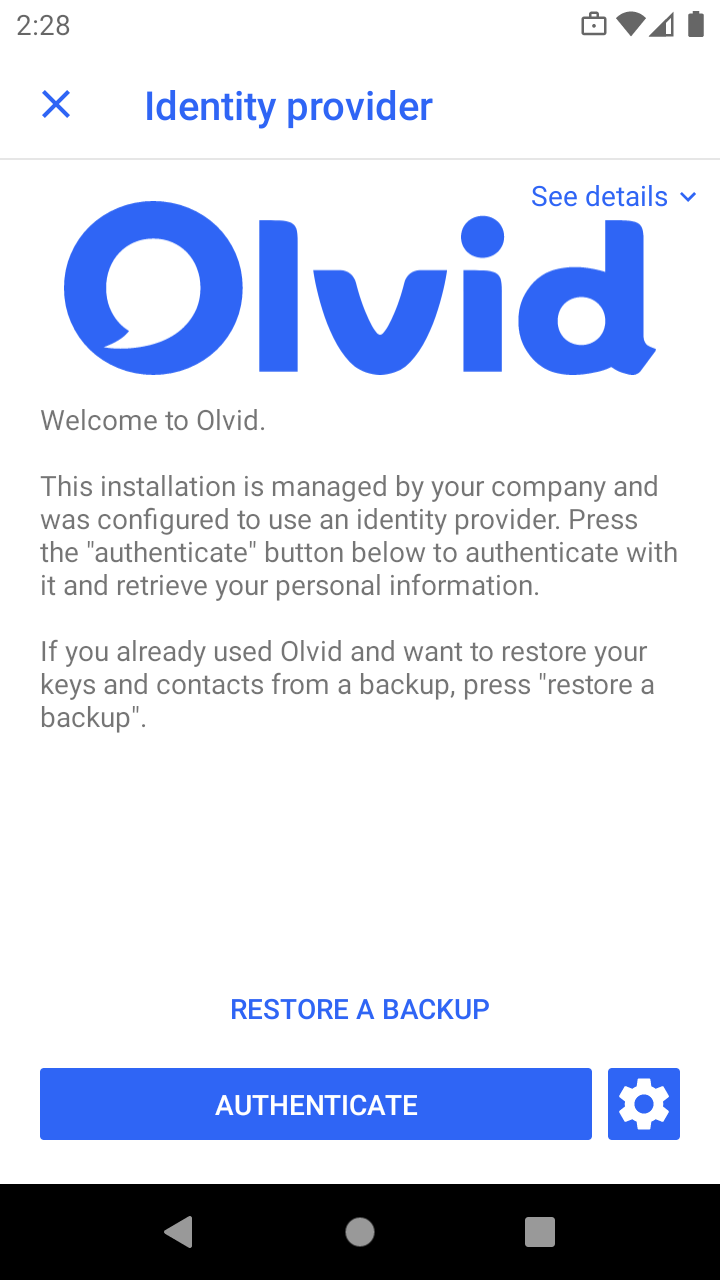
That’s it, Olvid will be installed automatically (or manually depending on your choice) on all selected devices, and once a user opens Olvid, your keycloak server will be automatically configured for him.
The first time your users launch Olvid, they should see the following screen, directly prompting them to authenticate, instead of the usual blue startup screen:
2. Automatically grant required permissions to Olvid
When using Olvid, users will occasionally be prompted for permissions to access the camera (for example, when scanning a QR-code), or to record audio (for example, when starting a phone call). It is possible to simplify Olvid’s usage for your users by automatically granting such permissions through Workspace ONE by adding a Profile.
- From Workspace ONE UEM, open Devices > Profiles & Resources > Profiles and click the Add button at the top.
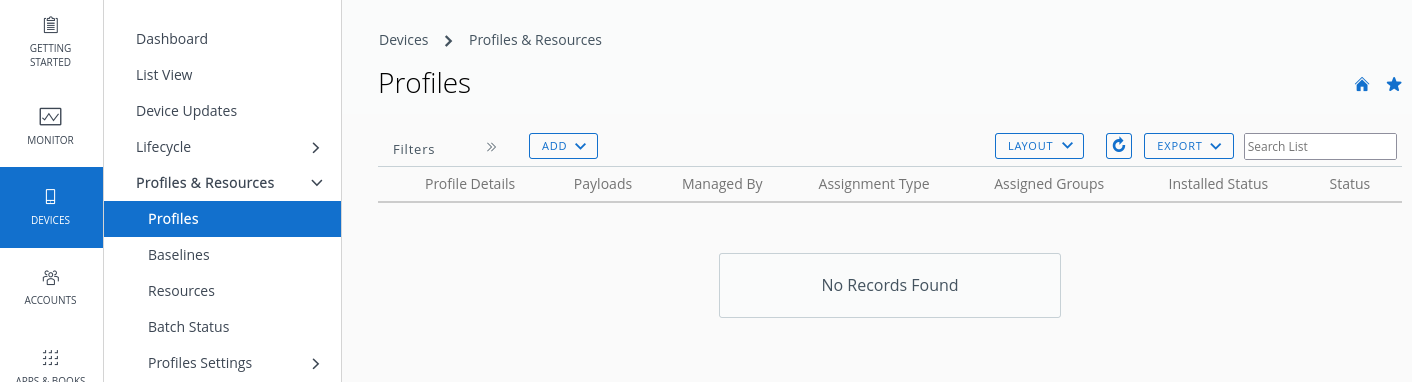
- From the dropdown select Add profile and click Android in the dialog the opens.
- Choose a name for this profile, something like “Permissions for Olvid on Android” and scroll down the list to click Add on the Permissions item.

- Now in the App 1 tab, enter “olvid” in the Search an app field and Olvid should appear in the dropdown. Select it.

- You may now select Grant permission for all relevant items. Note that most of these items do not in fact prompt the user for permissions as some permissions are automatically granted by Android. The important ones are:
- android.permission.BLUETOOTH_CONNECT (for bluetooth headset phone calls on Android 12 and up).
- take pictures and videos (for QR code scanning).
- read phone status and identity (to mute Olvid phone calls when an traditional GSM call is in progress).
- record audio” (for Olvid phone calls and voice messages).
- android.permission.SCHEDULE_EXACT_ALARM (to allow timely expiration of ephemeral messages on Android 12 and up).
- Click Next and select which devices to assign this profile to.
- Click Save & Publish.
You can check that the profile is properly configured on you user devices by opening the Workspace ONE Intelligent Hub application on your phone:
- Open the Support tab.
- Tap on your device.
- Tap on Profiles.
- The profile you created should be listed as Installed.
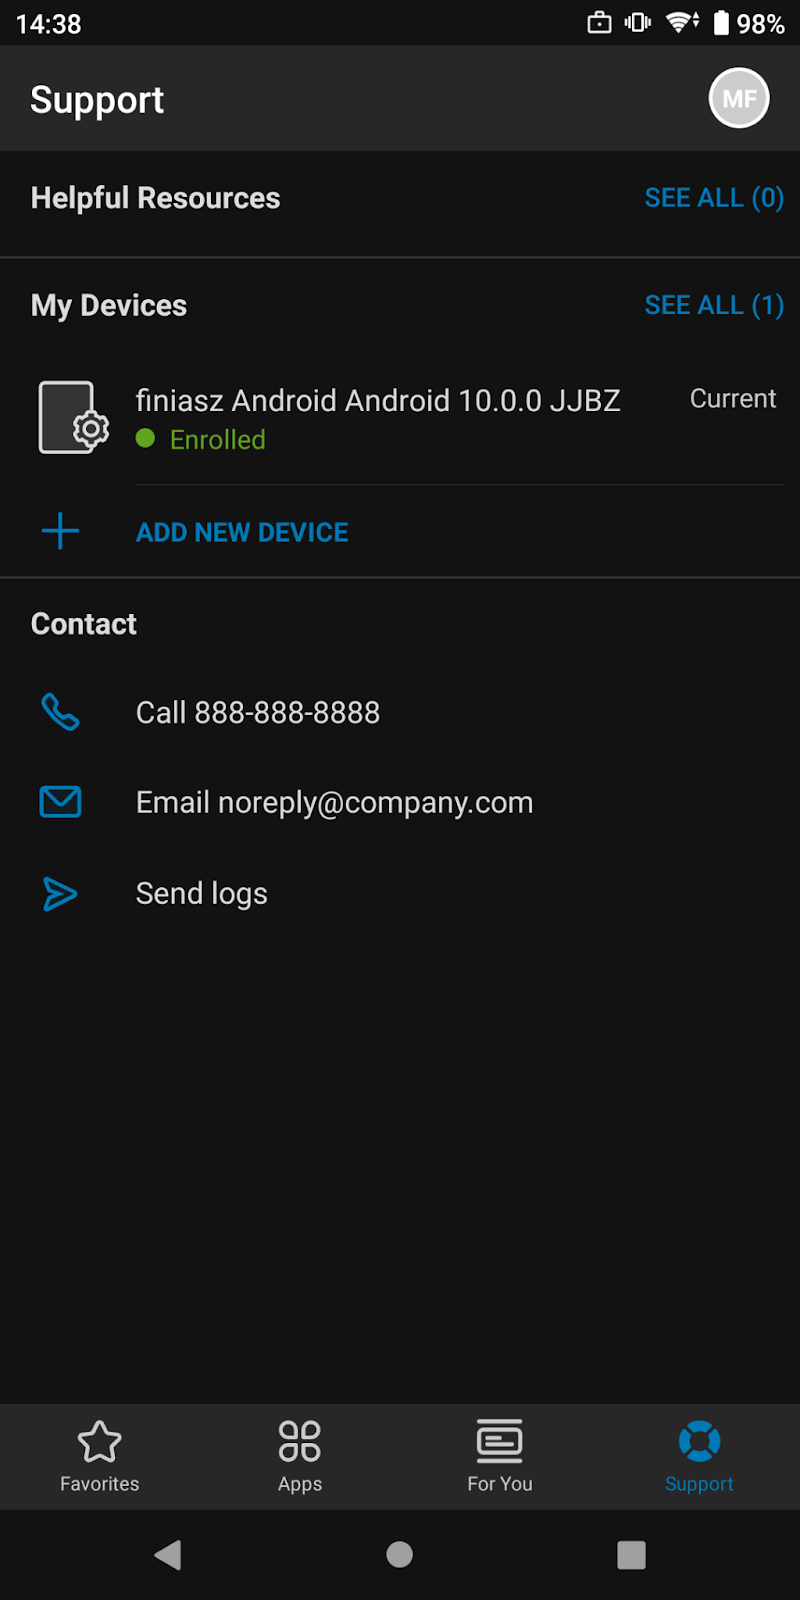
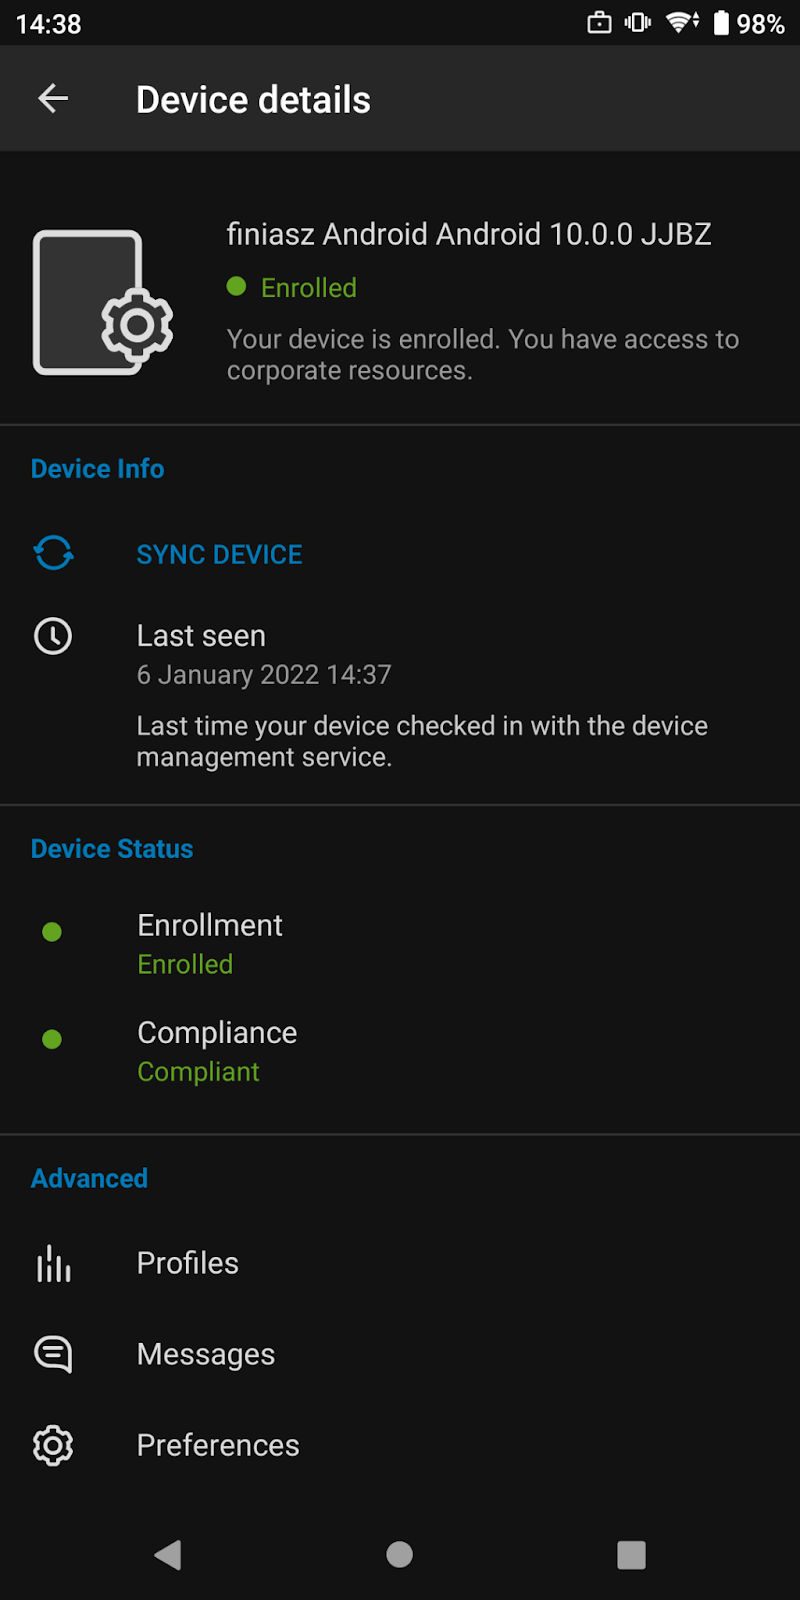
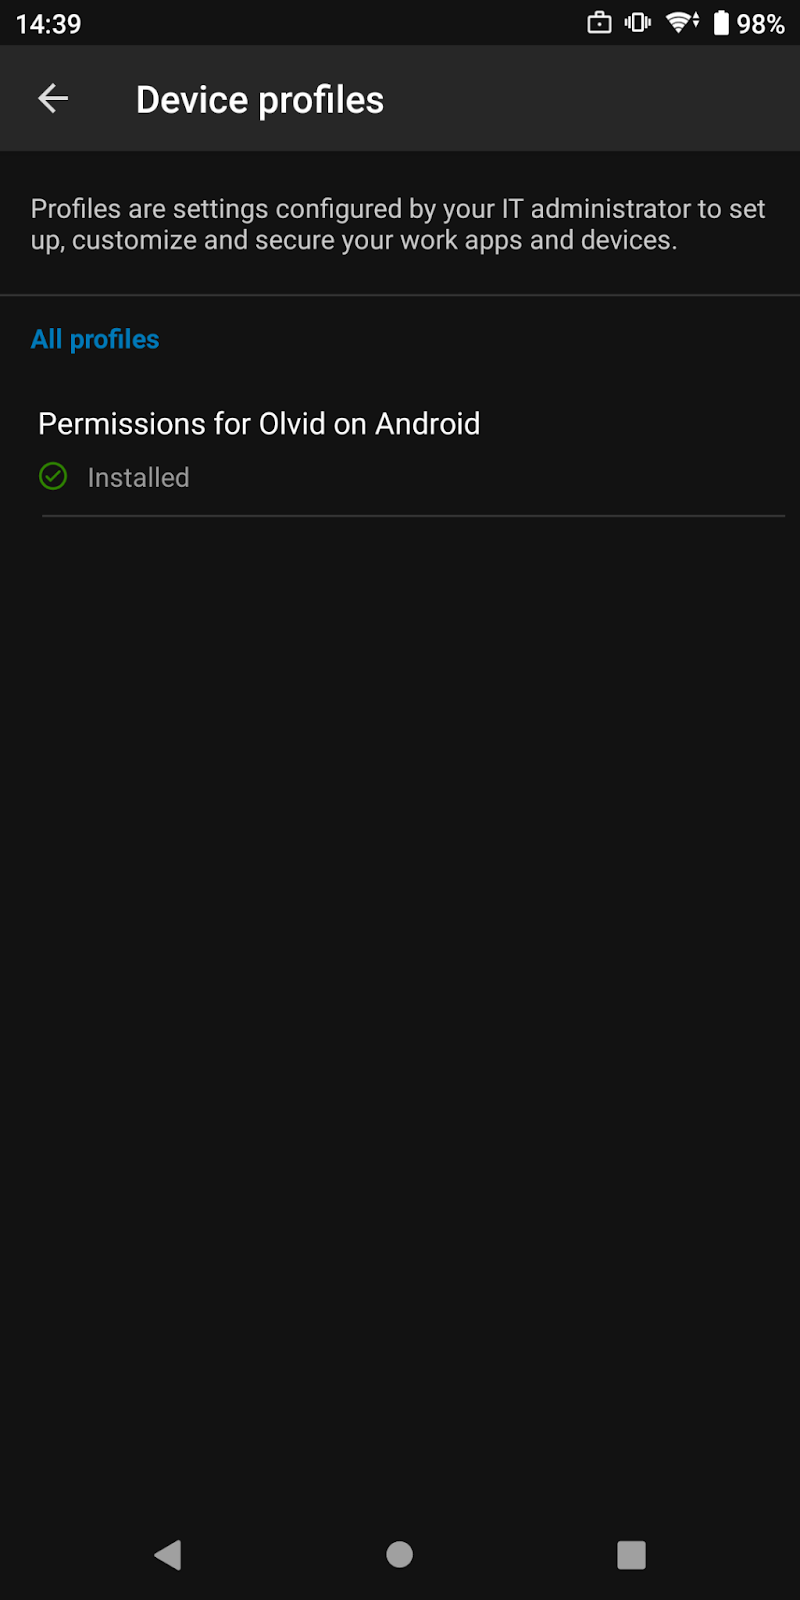
Of course, synchronization with the Workspace ONE server is needed and may take some time. You may tap “Sync Device” in the “Device details” screen to speed things up!